How to Sew the Zircon Yokes
The Zircon yokes are the most time consuming step of the construction process, mostly because you need to be precise and you can’t hurry through the steps. The angular seams are an eye-catcher, and if you sew in haste the mistakes will show easily. That said, it is not actually very difficult, it just requires some patience. This tutorial will walk you through the steps. I am using the wrong side of the pink quilted jersey as the contrast fabric, I hope this isn’t too confusing.
What You Need
- The front and back yokes, stabilised and seam allowance clipped
- The front and back bodice, stabilised and seam allowance clipped
Note: I used a contrasting colour to stabilise for the purpose of this tutorial, but it doesn’t have to stand out as much. It could also be just a shade lighter or darker than your fabric. Also, I forgot to clip the seam allowance for the first few photo’s, in case you’re wondering why it doesn’t show.

Step 1: Attach yoke to bodice


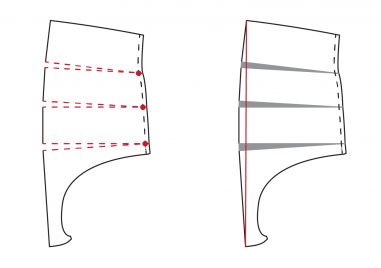
Pin the ‘start here’ marks on the front bodice and front yoke together. Line up the first stretch of seam towards the center front and pin the next corners together at the marks. Sew that first part of the seam, just left of the stabilising stitches.

When you get to the corner, put the needle down and the presser foot up. Pivot the fabrics around the needle so the next part of the seam lines up. Put a pin through the next corner at the marks. Repeat this until you get to the ‘start here’ mark on the other side. Then repeat for the back yoke and back bodice.

As you move along the seams, the fabric will not lie flat anymore and it will seem a bit messy. Don’t worry about what is happening behind the needle, just make sure that the fabric lies flat and matches up in front of the needle.
Step 2: Clean Up

Because you can only see one side when you’re sewing, there will inevitably be some threads showing when you check the seams. If there is a large gap, like in the photo above in the middle, sew that part again. If it is only just showing, like in the photo at the top, just take out the stabilising stitches. You can also leave this step until after attaching the sleeves and do it all in one go.
Step 3: Attach Neckband
Follow the instructions as given with the pattern or use this tutorial.
Step 4: Attach sleeves


Pin the sleeves to the bodice on the front and back. Ignore the yoke for now. Sew these seams and press them open. Use your serger or a zig zag to finish the seam allowances separately if you want to.
Step 5: Attach yoke to sleeve


Pin one side of the yoke to the sleeve, starting at the ‘start here’ mark. Sew this part the same as you did with the yoke, one seam at a time. When you sew with the sleeve facing up, you have the bulk on top instead of under and you can see better what you’re doing. Check that the sleeve seams are open when you sew over them so you get a smooth seam.
Step 6: Finishing Touches

Press all the seams of the yoke and sleeves open to get a crisp seam. Cut off the corners where necessary if they prevent the seam from lying flat. If you have a fabric that doesn’t press well or if you like the look, you can topstitch all around the yoke seam. I did this on my neoprene version. That’s it, now you can move on to the side seams!
If you have any questions, leave a comment.


Is this portion finished on the inside?
You can finish the seams with a zig zag or a serger after pressing them open.