How to do a Full Tummy Adjustment on a Swimsuit or Bodysuit
If you have a full tummy or abdomen, a swimsuit or bodysuit can be a bit tricky to fit right out of the envelope because it spans the whole torso, and it is tight fitting. We already give a few pointers in our post Fitting and Grading a Swimsuit. It is possible for instance to choose a larger size for the front than for the back if you have either a full tummy or a flat bum. If you need a larger adjustment, then this tutorial is for you.
A full tummy adjustment is needed because a full tummy takes up more space both vertical and horizontal than the pattern accounts for. The Nautilus Swimsuit already has some extra length added at the Center Front for the upper sizes, but that may not be enough. The extra horizontal room needed can easily be solved by choosing a larger size, but the vertical length needs to be added through slicing and spreading the pattern.
Before you can make your adjustment, you need to know how much to add to your pattern piece. Compare the measurement of the side seam of the front pattern piece to your own side, keeping in mind that you will also add a bikini piece on top. If you need length at the side seam, add this length to the front as well as the back piece by slashing and spreading the pattern piece.
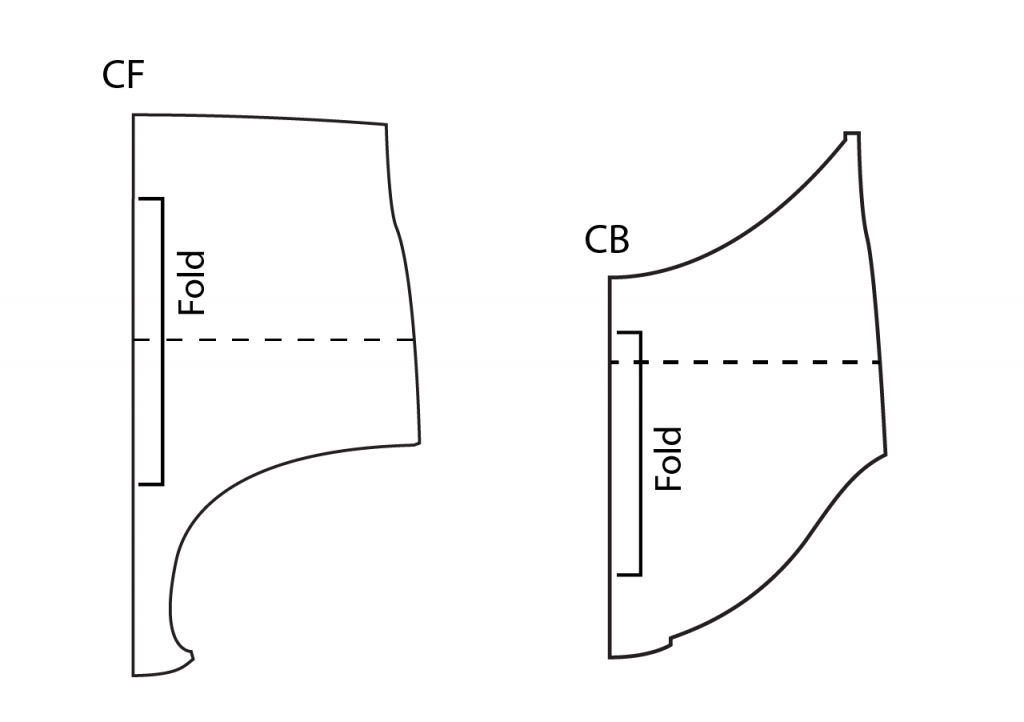
There is a lengthen and shorten line drafted on the Nautilus pattern piece, but you can place this line elsewhere if you know for instance that you need more length above your belly button than below, or the other way around. You can even draw two lines to have a more even spread. Draw this line at the same place for the back pattern piece.
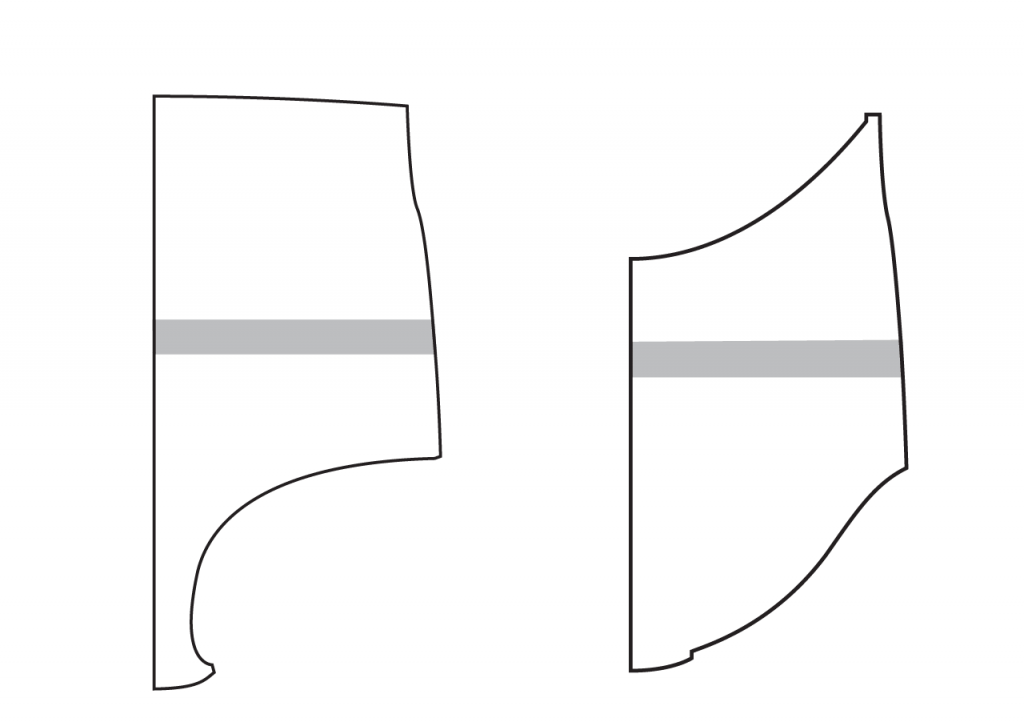
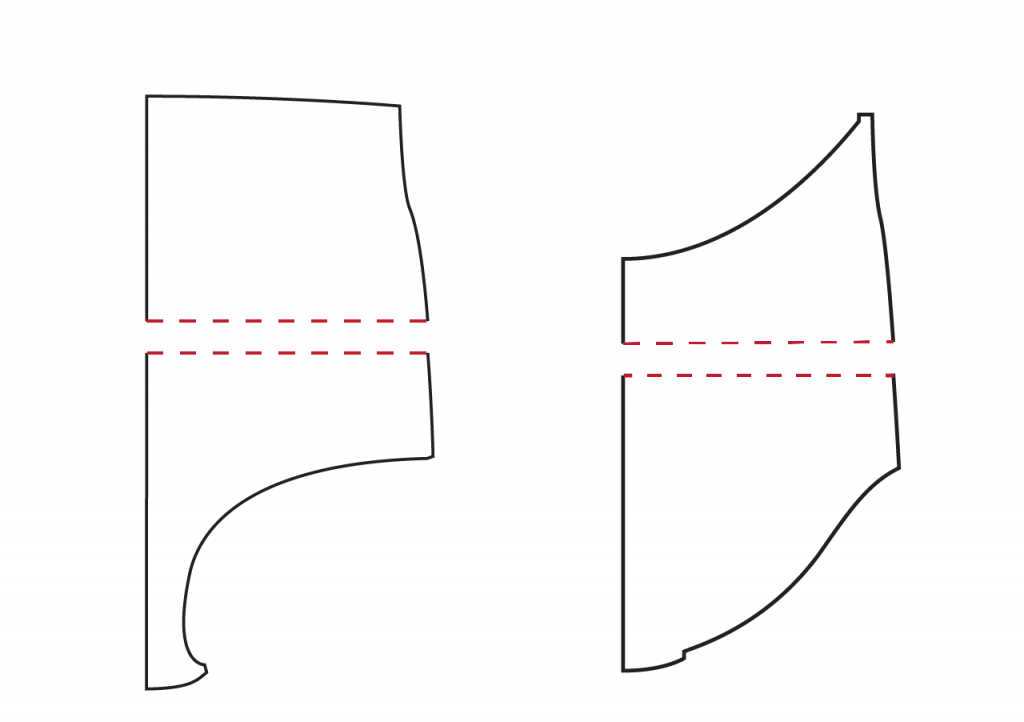
Spread out the pieces by the length you need, and add some paper to fill up the gap. Smooth out the side seam.
If after this adjustment, you still need more length at the center front but not the side seams, continue to the next step.
What You Need
- Front pattern piece of a swimsuit or bodysuit
- Long straight ruler
- Pencil
- Scissors
- Extra (pattern) paper
Step 1: Prepare pattern piece
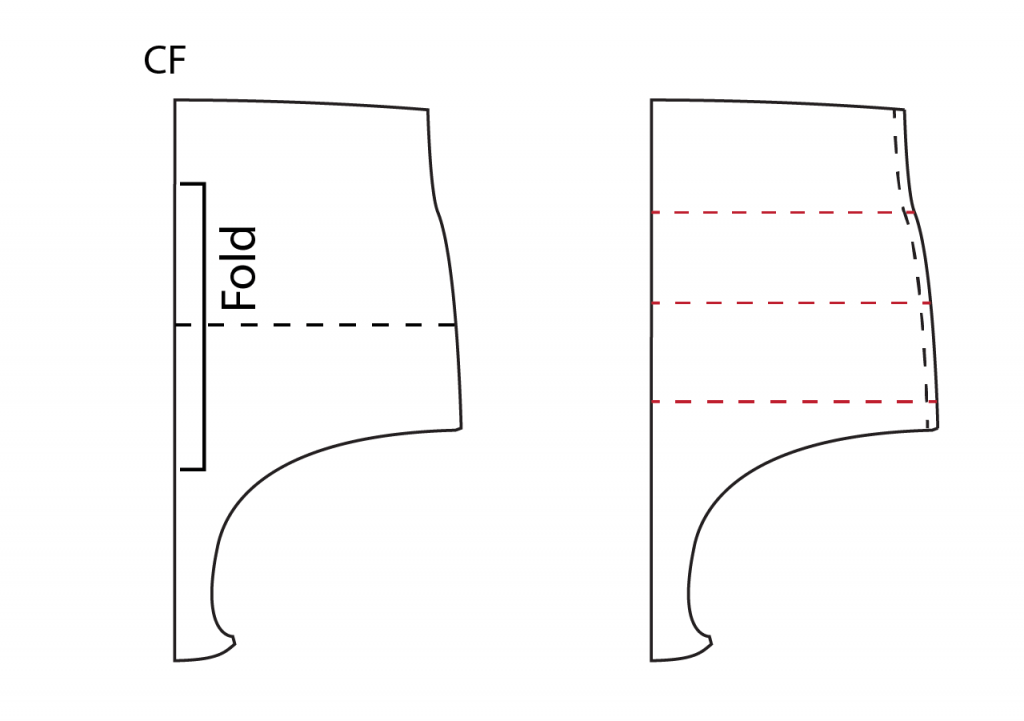
Start with drafting in the seam allowances on the side seam. It is 1/4″ (0.5 cm) for the nautilus Swimsuit. Then draw 3 horizontal lines from Center Front to the side seam. The placement of these lines determines where length is added, if your fullness is lower than place them lower than if it were evenly distributed between the top (the underside of the bikini) and the hips.
Step 2: Cut and spread
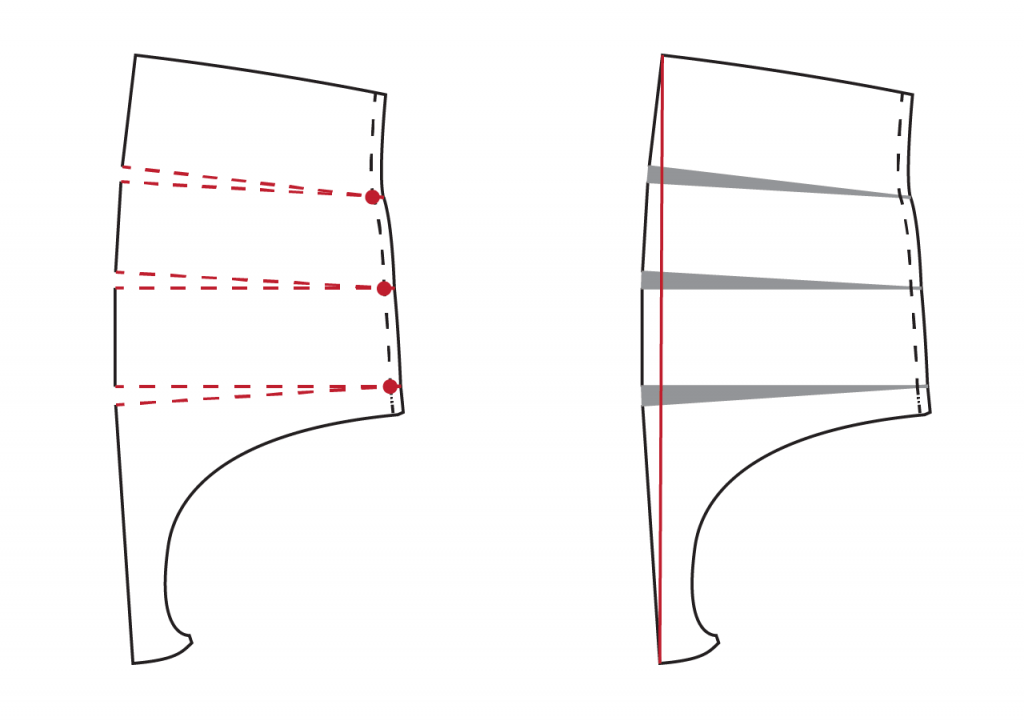
Cut along the lines you drafted, from the CF to the seam allowance (red dot). Then cut from the side seam to the seam allowance, without cutting through. This hinge is where the pieces will pivot. Spread the four pieces evenly by the amount you need to lengthen.
Add in paper to secure the pieces. Then draw a straight line from the top corner to the bottom corner. This will be your new CF.
Step 3: Add width back in
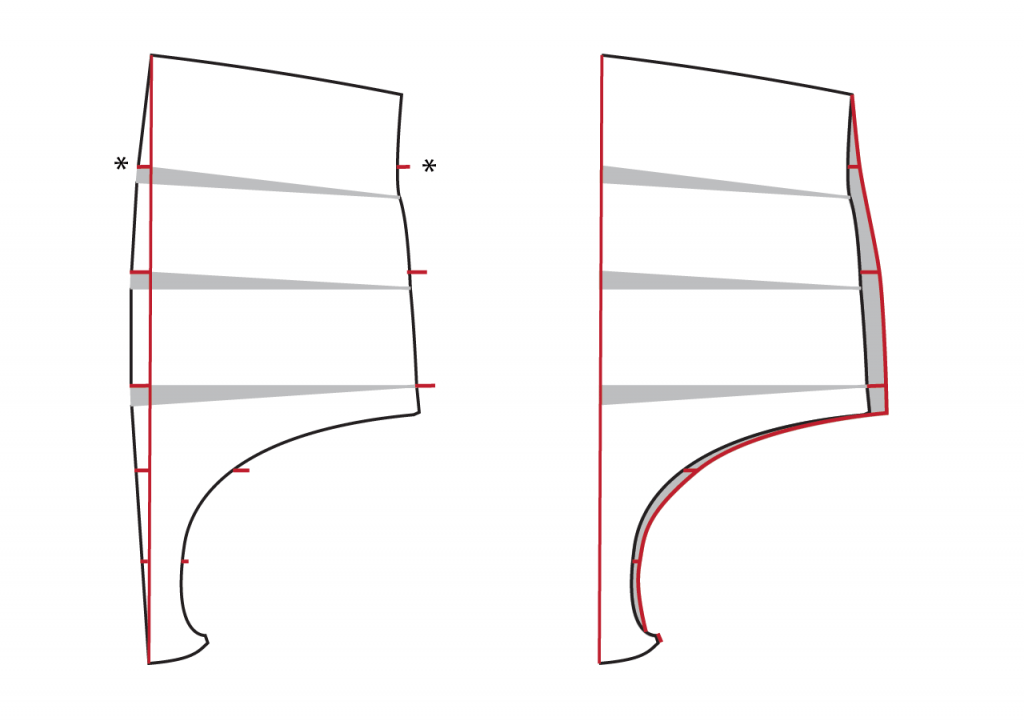
The new CF has eliminated some width that you now need to add back in. Add some paper to the side seam and leg openings. Measure the amount taken off at a few places, as shown above, and mark that amount at the side seam, at the same height. Connect these points with a smooth line. Then cut along the new CF line.