How to do a Full Bust Adjustment on the Coral Sweater/Dress
Our Coral Sweater and Dress pattern is a peculiar one: it has no darts whatsoever as they have been drafted into the horizontal seam between pattern pieces 1A and 1B/1D. But it might happen you need a full bust adjustment, so in this post we’ll explain how to do that. Before you start, please read When Do You Need a Full Bust Adjustment to decide whether you need and FBA to begin with. If you have any questions, let me know in the comments.
A full bust adjustment on a dartless shirt is done by slashing and spreading the pattern out until you have the extra width and length across the bust that you need. This creates a new bust dart, that you can then leave in or take out by slashing again and moving the side seam back in.
What you need
- front pattern pieces 1A and 1D of the Coral Sweater/Dress
- straight ruler
- pencil
- scissors
- extra pattern paper
Step 1: Prepare pattern piece

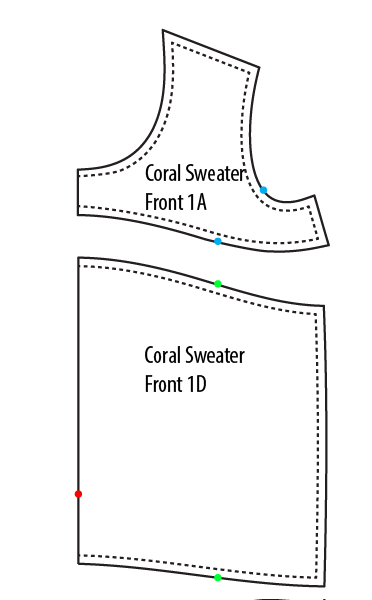
Start with drafting in the seam allowances on the armhole and side seam. They are 3/8″ (1 cm) for all seams. Then hold the upper part of the Coral Sweater and Dress (1A) to your body and determine your upper bust center. Mark it on the pattern. I have marked it with a blue point on the 1A pattern piece and green on the 1D pattern piece.
Step 2: Draft and shift
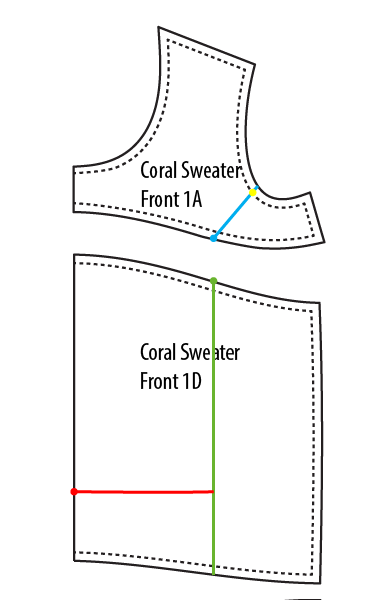
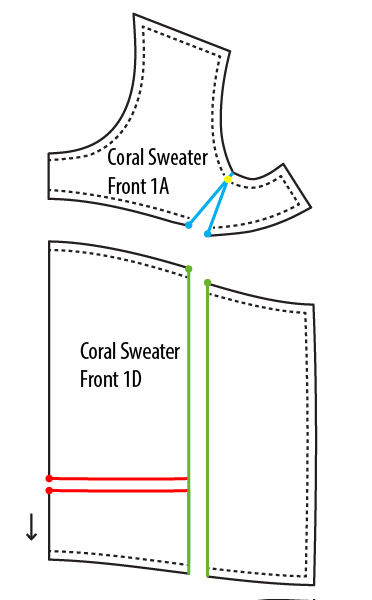
On the upper part of the 1A pattern pieces, start from the upper bust center mark, draft a straight line towards the armhole (blue line 1). On the lower part of the 1D pattern piece, draft a second line from the apex straight down to the hem (green line 2). Draft a third line (red line 3) from the center front to the green line.
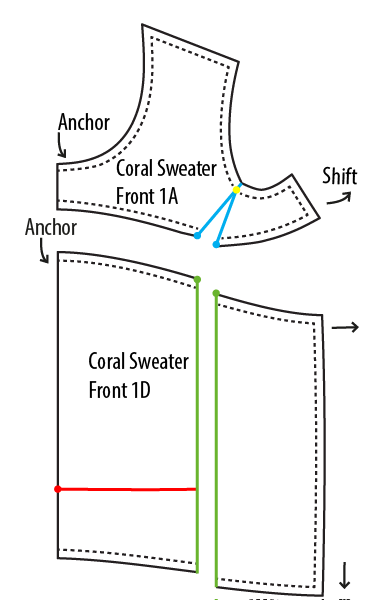
- Cut the blue line from the upper bust center up to the armhole stitching line (yellow dot), but not completely through.
- Cut the green line from the upper bust center to the hem.
- Cut the red line.
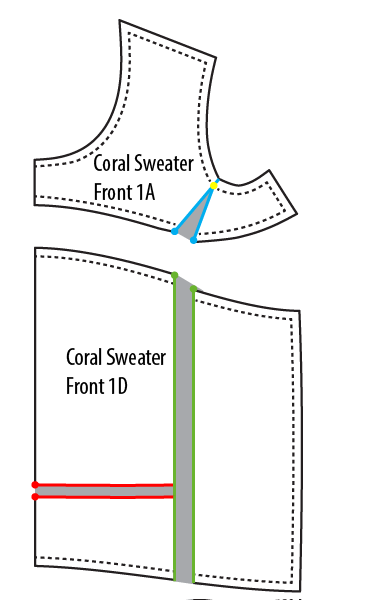
Anchor the 1A piece on the center front while you shift to the right the end of the armhole. Anchor the 1D piece on the center front too and shift it left and down. Keep the pattern flat. The amount you create between the blues and greens lines should be half the amount you need. Keep the green lines parallel to each other. When you have that piece in place number 1D, anchor it and shift the red one down until it matches at the hem.
Step 3: Fill
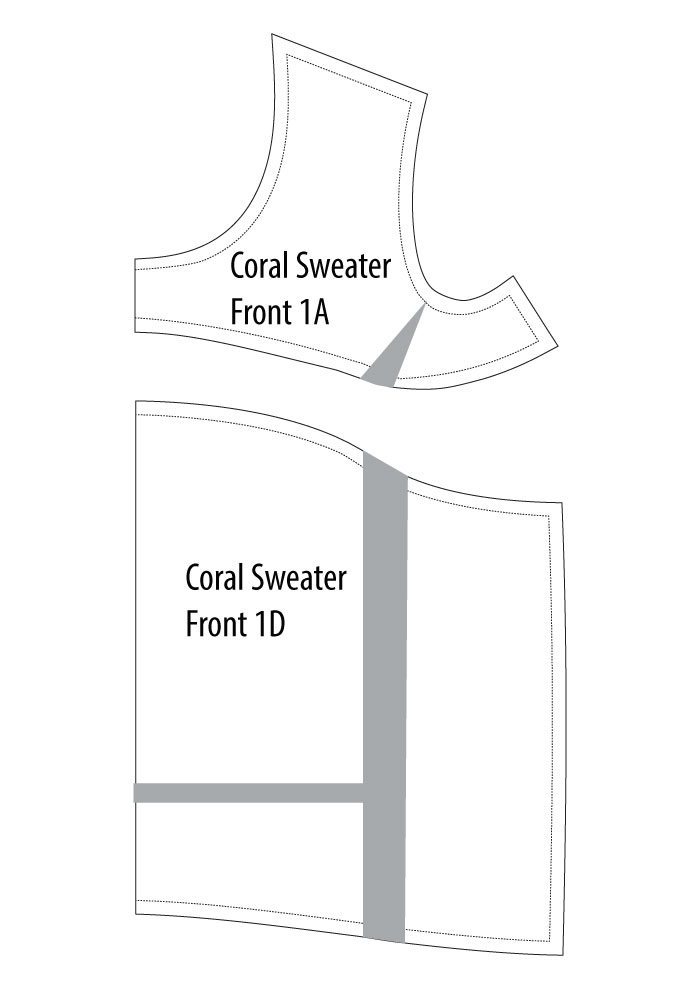
When you have your pieces in the right position, fill the gaps with extra pattern paper and tape them down.
This is what it should look like once taped.
Step 4: Redraw and join the seams
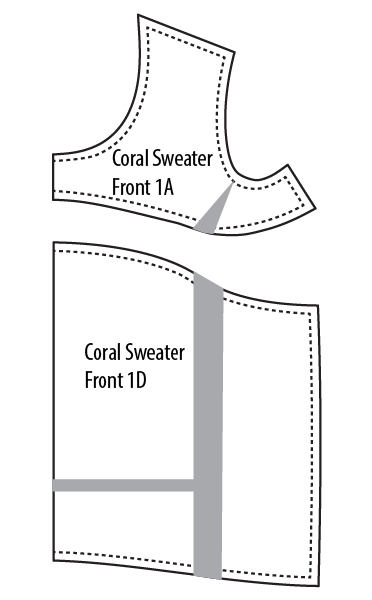

If you want to still work on these pattern pieces, connect them with a continuous line to fill the blank spaces left by adding the paper. The grey areas in the illustration show where you’ve added room by making this adjustment. Or you can redraw them on a new piece of paper so that you have for yourself the old piece with all the changes you have made.
Step 5: The new pattern pieces
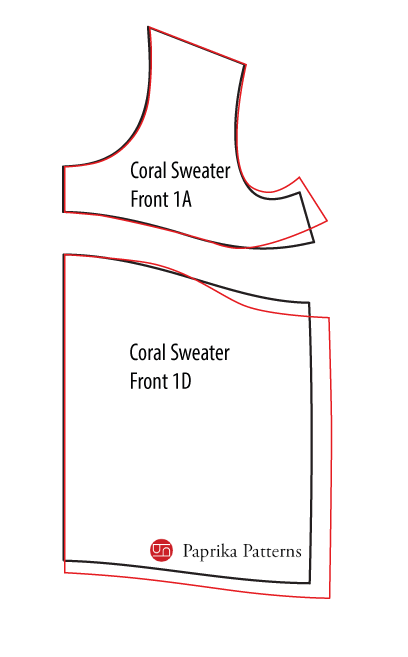
You have your two pattern pieces drafted to suit your body. Don’t forget to also lengthen the back pieces, once you’ve done your full bust adjustment.
It’s quite an alteration, but worth it if it gives you a great fitting Coral Sweater/Dress! If you have any questions, please leave a comment.
Other full bust adjustments you can find on the blog
I’ve also written tutorials on full bust adjustments of other types of bodices:
- How to do a small full bust adjustment for princess seams
- How to do a large full bust adjustment for princess seams
- How to do a full bust adjustment on a pattern with waist darts
- How to do a full bust adjustment on a dartless pattern
If you wish to follow us on Social Media, you can find us on Facebook and Instagram.