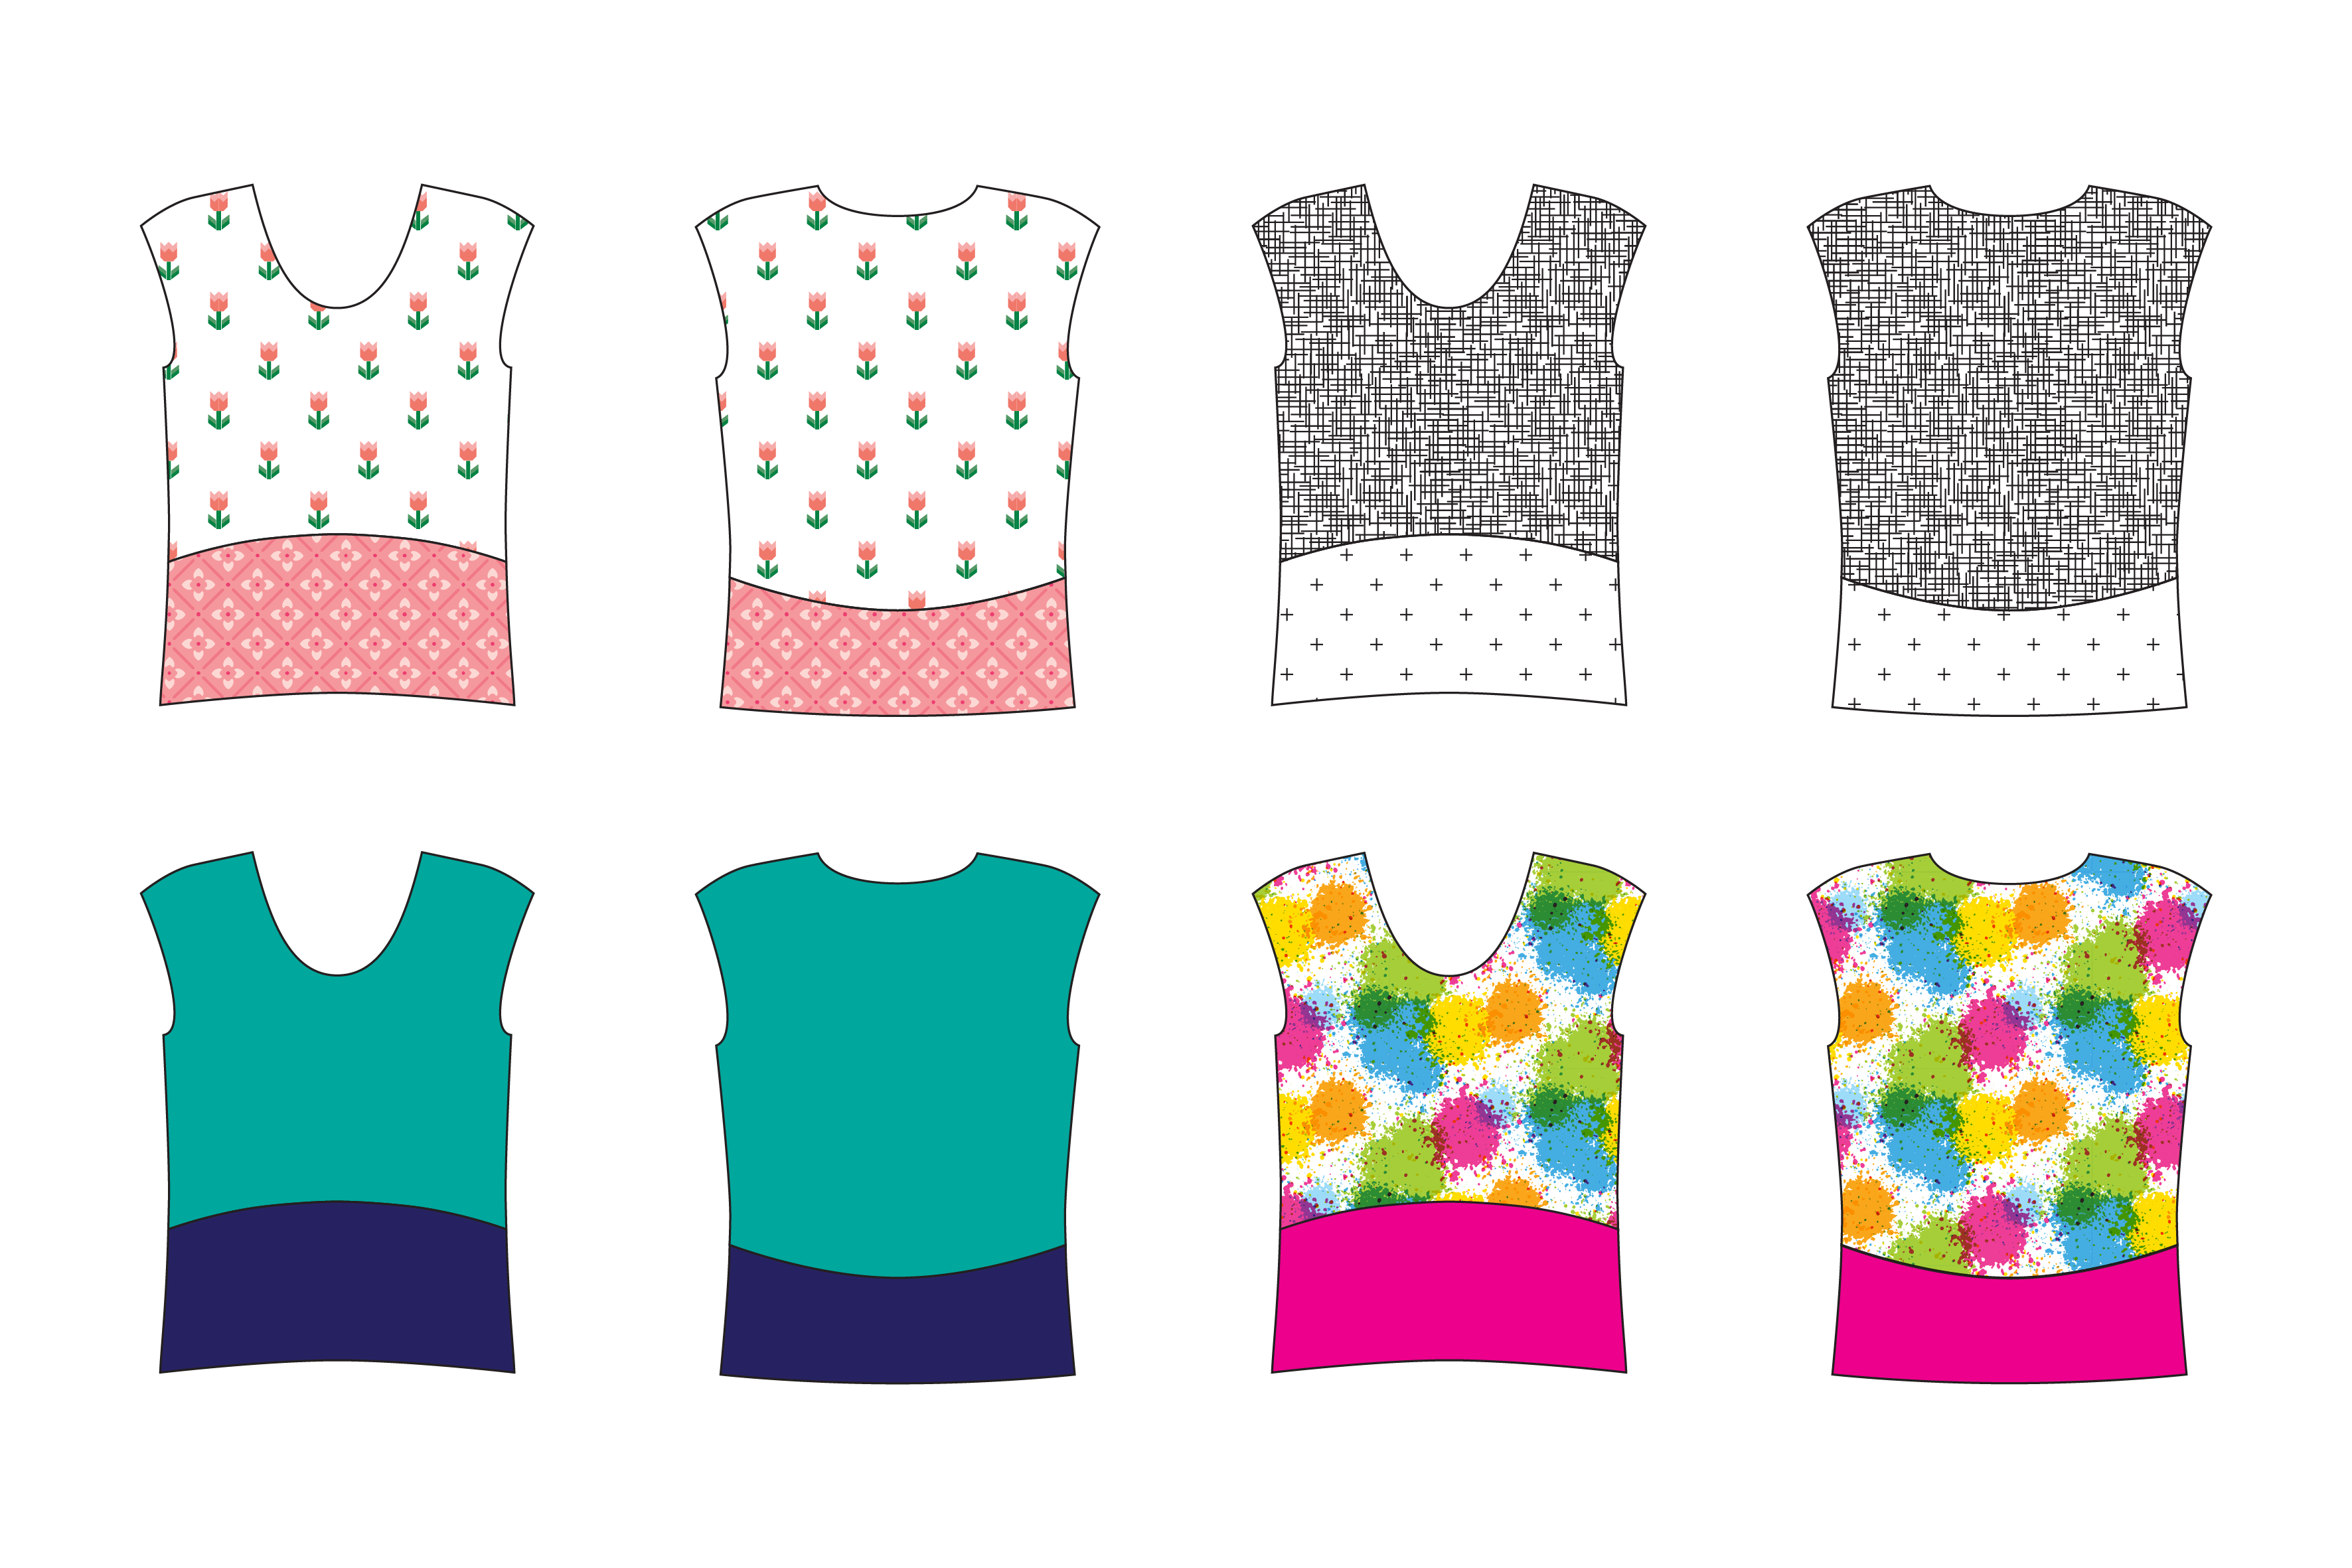
Pattern Hack: Colour Blocked Onyx
Today I’ll show you how to adapt your Onyx pattern so you can make a colour blocked shirt. It’s a very simple adjustment since the cropped View B already provides us with a guideline for where to slash the pattern. I’ve made illustrations instead of photos because I still need to set up a space with good light. If you have any questions, let me know in the comments.
What you need
- Onyx pattern View A, front and back
- ruler
- pencil
- extra pattern paper

Step 1: Front

First you need to draft a new cutting line. You can use the lines of View B as a guide but you don’t need the dart. Draft a fluent line close to the line of View B, ignoring the dart. Your line should end and start at the same place as the original line. Cut the pattern along this line.
Step 2: Seam allowances

Add seam allowances along the cutting lines. Tape both pattern pieces to a strip of pattern paper. Measure out 5/8″ (1.5 cm) along each cutting line, and draft a new edge parallel to the cutting line. An easy way to do this is to copy the edge onto the pattern paper, then shift the pattern 5/8″ (1.5 cm) up or down and tape it in place. Cut it out.
Step 3: Back

The back is simple: cut along the lines of View B and add seam allowances the same way as you did for the front piece. That’s it!
Step 4: Sewing

As the first construction step, sew the two front and back two pieces together, so you have one front and one back piece. Depending on your fabric, you can use french seams or finish the seams with a zig zag of serger. Try to finish them close to the seam (1/4″ or 0.5 cm) so you can keep the curve smooth. More bulk around the seam will make the curve wavy and heavy looking. After that, follow the instructions as per usual. I have not included the sleeves and cuffs here but you can of course use them too. Maybe make the epaulet in the same fabric as the bottom of your top? The possibilities are endless!