
Size Selection and Fit for the Citrus Leggings
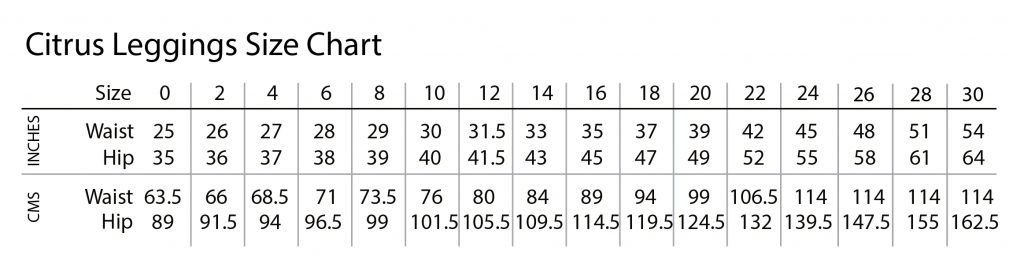
For the Citrus Leggings, we recommend that you select your size based on your hip measurement and make any necessary changes from there. Every person’s body is unique and every person has different fit preferences and these are all affected by the particular fabric you use. Additionally, these leggings are quite forgiving in fit because they are sewn from 40% stretch fabric with a reasonable amount of negative ease so you may comfortably fit into a range of sizes or you may not feel you need adjustments despite having measurements that differ from our size chart. That being said, we have some general recommendations for getting the best fit out of your Citrus Leggings. You’re always welcome to get in touch with specific questions about your own personal fit!
Inseam Length
The first measurement to take is your inseam. There are 3 different inseam lengths to choose from:
- 26″ for a body height of 5’0”-5’4” (152cm – 163cm)
- 29″ for a body height of 5’4”-5’8” (163 cm – 173 cm)
- 32″ for a body height of 5’8”-6’2” (173 cm-183 cm)
It’s a good idea to actually take the measurement and not just go with body height though, as proportions can differ. With that measurement you can choose the right pattern piece to print and cut out. After all, after sewing them up you can still adjust the width but not the length. Note that the inseam length is shorter than the inseam you would wear on a pair of trousers. These leggings should stop at your ankle so they don’t bunch at the bottom. You will want to select an inseam that is 1-3” (2,5-7,5 cm) shorter than your trouser inseam, depending on your preference.
Choosing a Size
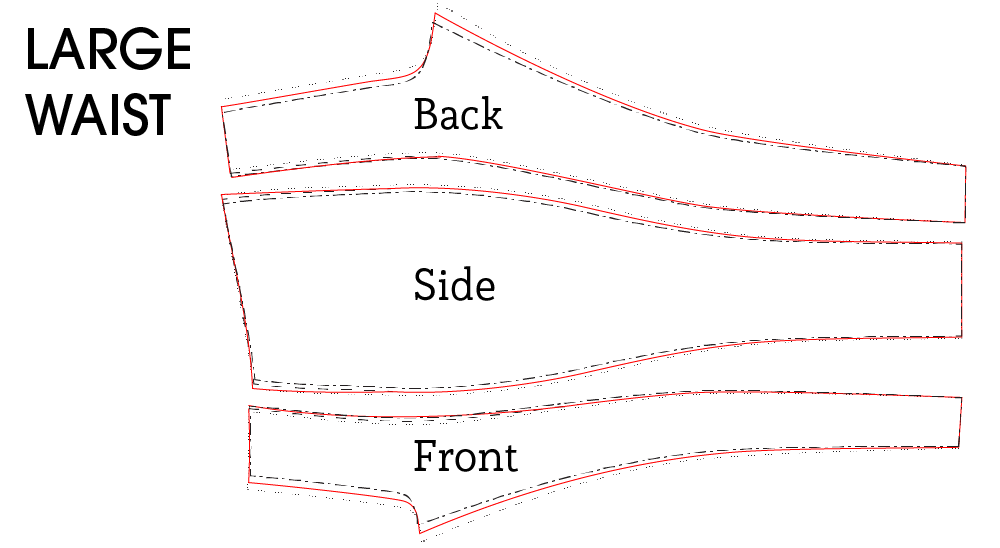
NOTE: Rather than just tracing between sizes, you’ll need to use a bit of common sense when grading these pattern pieces because of the way they are nested. If you look carefully, the Front and Back pieces are nested smaller to larger on one side but larger to smaller on the other. Therefore, when adding width to an area, you may actually be drawing along the line that is marked for a smaller size. To help, I recommend tracing your base size in a single color and then going back with a second color to make your alterations. At a glance, you’ll be able to tell if you’ve added or subtracted fabric.
If your hip measurement puts you between sizes, you can round down in your size selection. If your waist is a size or two larger than your hip size (e.g your hip is a size 0 but your waist is a size 4), you may not need to grade the pattern as there is less negative ease in the waist of the finished garment than elsewhere to make it easy to pull on and off over your hips. If your waist is more than two sizes larger than your hip size (e.g. your hip is a size 8 but your waist is a size 14) you may want to grade up at the waist, however a good general rule is that you never want to grade up more than 2 sizes as you risk getting distortions.
If your waist is smaller than your hip size we recommend making no alterations but instead making the waist snug with your elastic. This is important for fabrics at the low end of the recommended 40% stretch because it may be difficult to put the leggings on and off if the waist is any smaller. If your fabric is more stretchy than you can get away with grading the waist down in size.

Your unique body shape also affects how you’ll want to fit these leggings. The patterns are designed assuming that your low waist measurement is half way between your waist and your hip measurement. If your natural waist and low waist put you in the same size and that size is different than your hip, you’ll want to grade as above. If you have larger low waist (regardless of your natural waist measurement), you may want to do a fully belly adjustment. While there are more precise ways to do it (that are necessary when using wovens), we have a lot of wiggle room since this is for stretch knits, so we suggest a simple adjustment of just adding a bit of extra height to the front crotch. You can make a similar easy adjustment to the Back for a full rear. (You can also make the inverse adjustments for a flat belly or flat bum.)
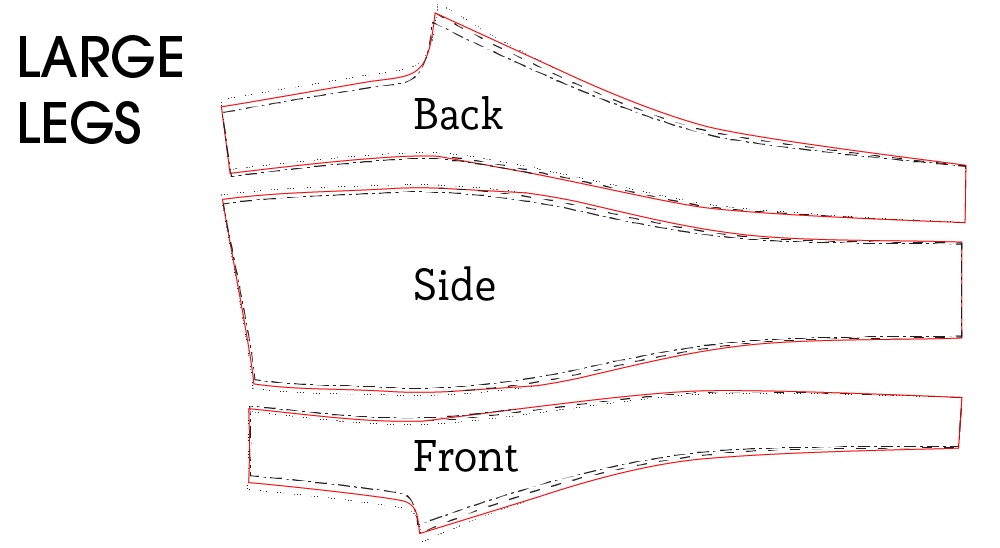
If you know that your legs are significantly skinnier or curvier than average, for your hip size, you may want to go down or up a size through the legs. You can also make grading adjustments just through the thigh or just through the calf. An alternative to making these leg adjustments in advance is to baste your seams from hip down and then take in or let out through your leg as necessary before sewing the seam.
The sizing of the Citrus Leggings is based on fabric with 40% stretch and accommodating bulky fabrics like scuba. This leaves the fewest sizing questions or modifications for the largest number of fabric types. However, if your fabric is particularly thin and/or particularly stretchy (like a lightweight sport lycra which can easily have 70% stretch), you may wish to go down a size to get the smoothest fit through the thigh and stomach. Minor wrinkling with movement is normal.
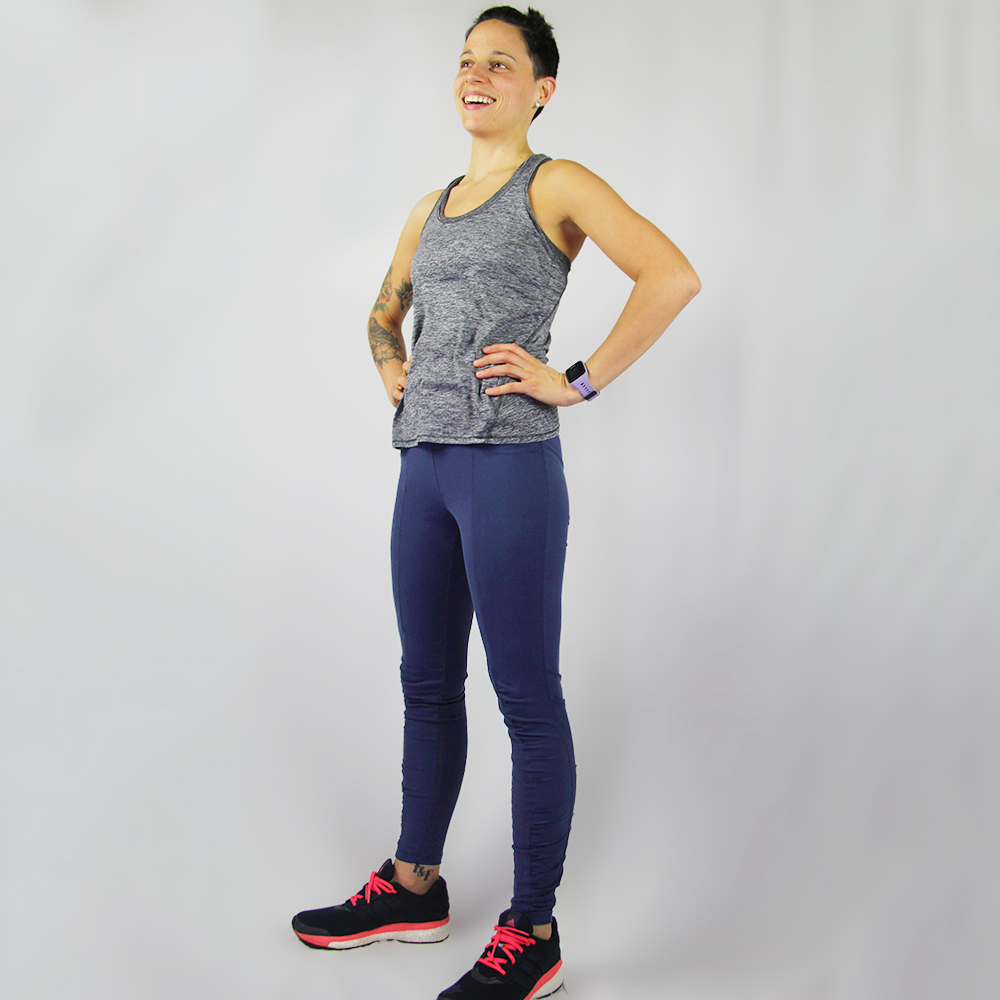
Fit
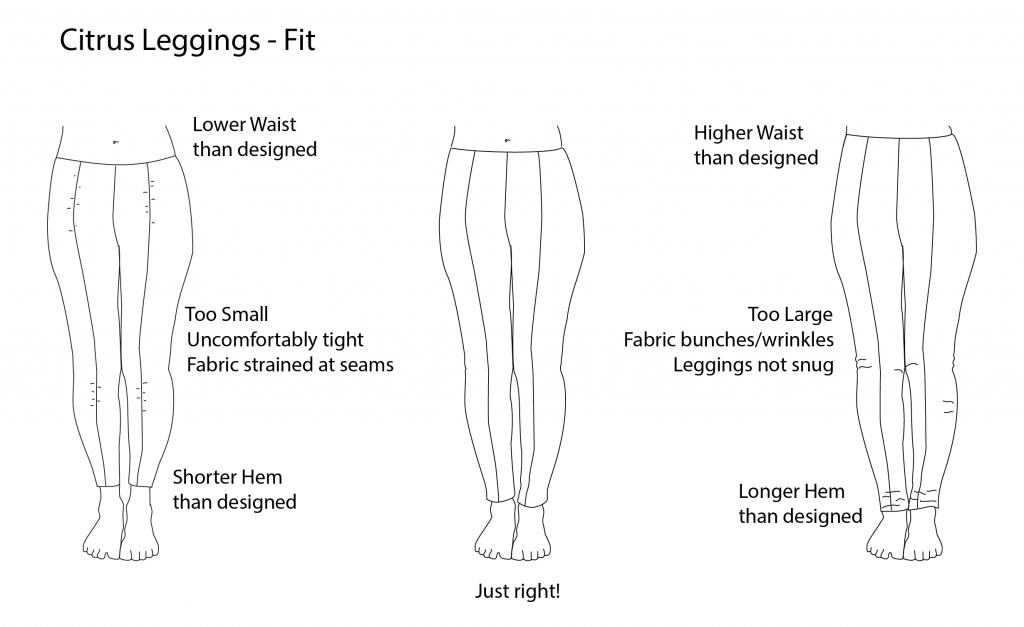
If you have done your pattern adjustments and sewn the leggings up, you can still make adjustments to the width. We recommend making these adjustments to the seams without gathering if they are small (1/4″ or 0,5 cm per seam), but if you have more to take out divide equally between all seams. The illustration above points out what to look for when fitting.


