Presidio Purse: Inserting the Zipper

If you want to insert piping at the edges of the zipper tape, sew it on now, following the “how to add piping” part of the sewalong. The way that this zipper is inserted, part of the zipper tape is visible, so your piping won’t show up much if it is the same color.

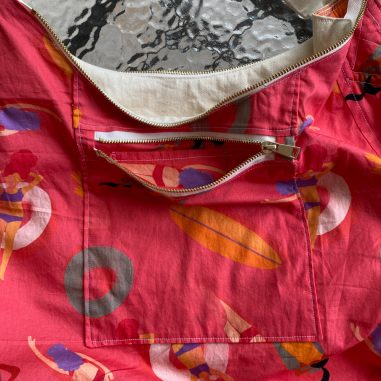
If you are using a separating zipper, which is easier because you don’t have to worry about twisting your zipper tape, unzip the zipper all of the way. Pin it to the top curved part of the bag with the teeth facing down so that the teeth are more than 1/2″ away from the top of the bag. (Teeth facing down means both teeth are pointed away from raw edge of the bag and the right side of the zipper is against the right side of the fabric). Sew (or baste) the zipper with a 1/2″ seam allowance, starting and stopping 1/2″ away from the flat edge of the top of the purse (you need to keep this part free because you will be turning it inside to finish the edge in a few steps).

If you are using a separating zipper, sew the other side of the zipper tape to the other side of the bag in the same way.

If you are using a zipper tape that doesn’t separate, make sure you keep an eye on the orientation of the zipper because it stinks to sew a zipper on and then zip it and find that it won’t zip because you’ve twisted it! To make sure that I’m getting the orientation correct, I will usually fold over the seam allowance, like it will look when the bag is finished, and then pin the zipped zipper tape in place, so the bag is how it will look when totally sewn, just held together with pins. From there, it is easy to unzip the zipper and keep the orientation correct as you unpin and sew one side at a time.

Because you are sewing the zipper along a curve and your zipper tape is longer than the curve, even though you already stabilized it with stay stitching, it is easy to stretch the curve different amounts as you sew one side and then the other so that the zipper is misaligned at one end. To prevent this from happening, sew the zipper down on one side. Then use a pin or a chalk mark to mark the other side of the zipper at the point where the stitchline stops.

Unzip the zipper, and place the zipper so the marked point is 1/2″ away from the flat edge at the top of the purse. Pin and baste/sew the zipper in place as directed above.
Here’s the video about sewing the zipper to the top of the bag.
Attach the Lining

Turning the body right sides out and the lining right sides in, insert the body into the lining so that the top raw edges match. The Front should be right sides together with the Front Lining and the Back right sides together withe the Back Lining. Pin the curved edges in place and then sew along the same 1/2″ seam allowance that you already sewed/basted the zipper to the body, again starting and stopping 1/2″ from the flat top edge of the purse. As when you sewed on the zipper, you should not sew your seam right next to the zipper teeth but instead leave the zipper tape exposed.

Notch the curved seam allowance.

Turn the purse right side out through one of the gaps at the end of the purse.

Press the curved seam. Because your seam is curved, you may get better results and press more easily if you press it over tailor’s ham. Also, you should never press directly onto zipper teach – plastic teeth can warp and metal teeth can scratch your iron. If you can’t get your iron to press the seam without pressing the teeth, apply ample steam and then press the fabric down by hand.
Here’s the video about sewing the lining to the body.
Finish the zipper

To make the zipper look a little more polished, you can finish the end with a piece of fabric. There are two ways to do this. The first is as written in the pattern. Take a 2 x 2 1/2″ rectangle of fabric and fold each end in 1/4″ inch. You can see that I had a really hard time doing this on the upholstery fabric that I used for this demo, so for fabrics like upholstery fabric that are harder to work with, I recommend using the second method, described below. If you are using a cotton canvas, this method should be easy.

Fold the rectangle in half, slide it onto the end of the zipper, and pin it in place. Stitch around the edge of the rectangle using an edgestitch. Because I used a separating zipper, this (and the alternate method described below) covers the zipper stop at the end of the zipper. Therefore, when stitching the bottom of the rectangle, I stitched up to the edge of the zipper teeth, lifted the needle, and moved the zipper so that the next stitch starts just on the other side of the zipper teeth. If you are using a non-separating zipper, you can apply the cap to the extra zipper tape below the zipper stop and not worry about sewing over the zipper.

A second method for applying the zipper cap is to take a rectangle of fabric and sew it right side of fabric to the bottom of the zipper (right or wrong side) using a 1/4″ seam allowance.

Then I folded in the fabric up, away from the seam. Fold the edges in so they are even with the width of the zipper and pin. Then fold the end of the tab over by 1/4″ or so. You can see that my rectangle was a bit bigger than the 2 x 2 1/2″ rectangle recommended in the pattern. I chose to use a larger rectangle because the coat weight fabric that I was using didn’t press sharply and the larger seam allowances make it easier to manipulate. It means that my finished end piece will be a big longer and a bit bulkier than if I did the first method. I’m fine with that.

Fold the rectangle in half so that the folded over end is even with the seamed end of the fabric on the other side of the zipper. Pin.

Edgestitch around the rectangle of fabric, watching out for the zipper teeth as described above.

In the pattern there is a range of zipper lengths listed and the longer end of it can be pretty long. But, have no fear. There is a reason for all this extra zipper madness!

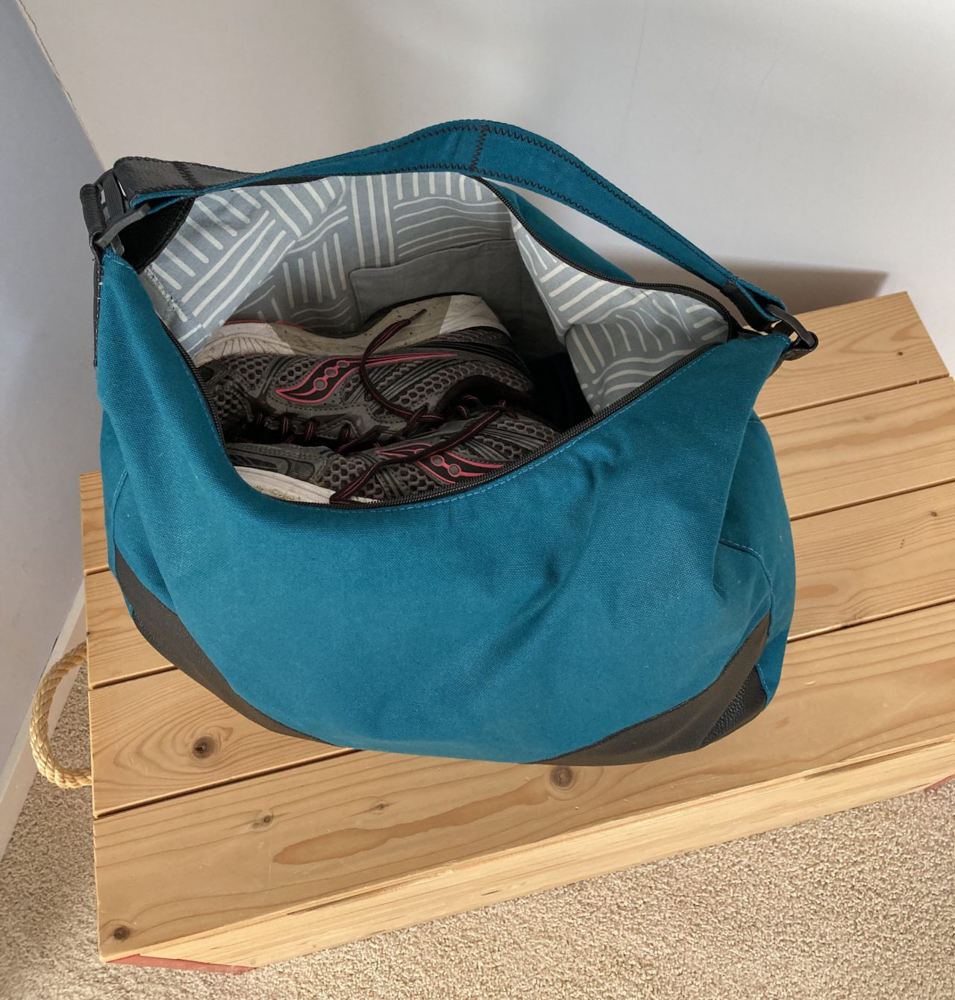
When you unzip your zipper all the way, the extra length allows you to fully open the end of the bag that has the zipper stop so you can take full advantage of the size of this bag.

When you are carrying the purse zipped up, just tuck the tail into the end of the bag and nobody is the wiser as to your excess zipper length.
Here’s the video about finishing the end of the zipper with a tab.

To finish the body construction, fold the unstitched flat ends of the purse over 1/2″ and pin and press in place. You can see that I pinned my lining down a tiny bit lower than the main fabric so that it is not visible from the outside when carrying the purse.

Stitch along the entire upper edge of the purse using an edgestitch or 1/4″ seam. This finishes the raw edges that you folded over and reinforces the zipper seam.
Here’s the video for finishing the top sides of the purse and doing the topstitching along the edge of the purse.


I would add, in case there is anyone out there not concentrating like I was first time I made this bag, that “teeth facing down” does not just mean teeth facing down the bag away from the opening, but rather the more usual sewing instruction of face down, i.e. right side of zip to right side of fabric. I was so busy being smug at the obviousness of what i thought the instruction was rather than paying attention to what it actually meant that I sewed my zipper on upside down. Turns out that an upside down zipper zips up ok but is a pain to open. So you need to unpick and resew (or rethink what is the outside and what is the inside of your bag).
Thanks for that point of clarification! I’ll edit the post to make that even more clear. In this case, it actually means both! You want to sew the zipper with the teeth facing away from the top raw edge of the bag as well as with the right side of the zipper against the right side of the fabric.