How to Sew the Jasper Hood
Sewing the hood of the Jasper may not be the most difficult step of the construction process, but I do think some steps benefit from real garment photo’s. Plus I have some tips to share that make it easier to achieve a neat end result. So if you prefer a big hood over the collar, follow these steps and you’ll have one in no-time!
What you need
- Your Jasper, finished up to Step 5
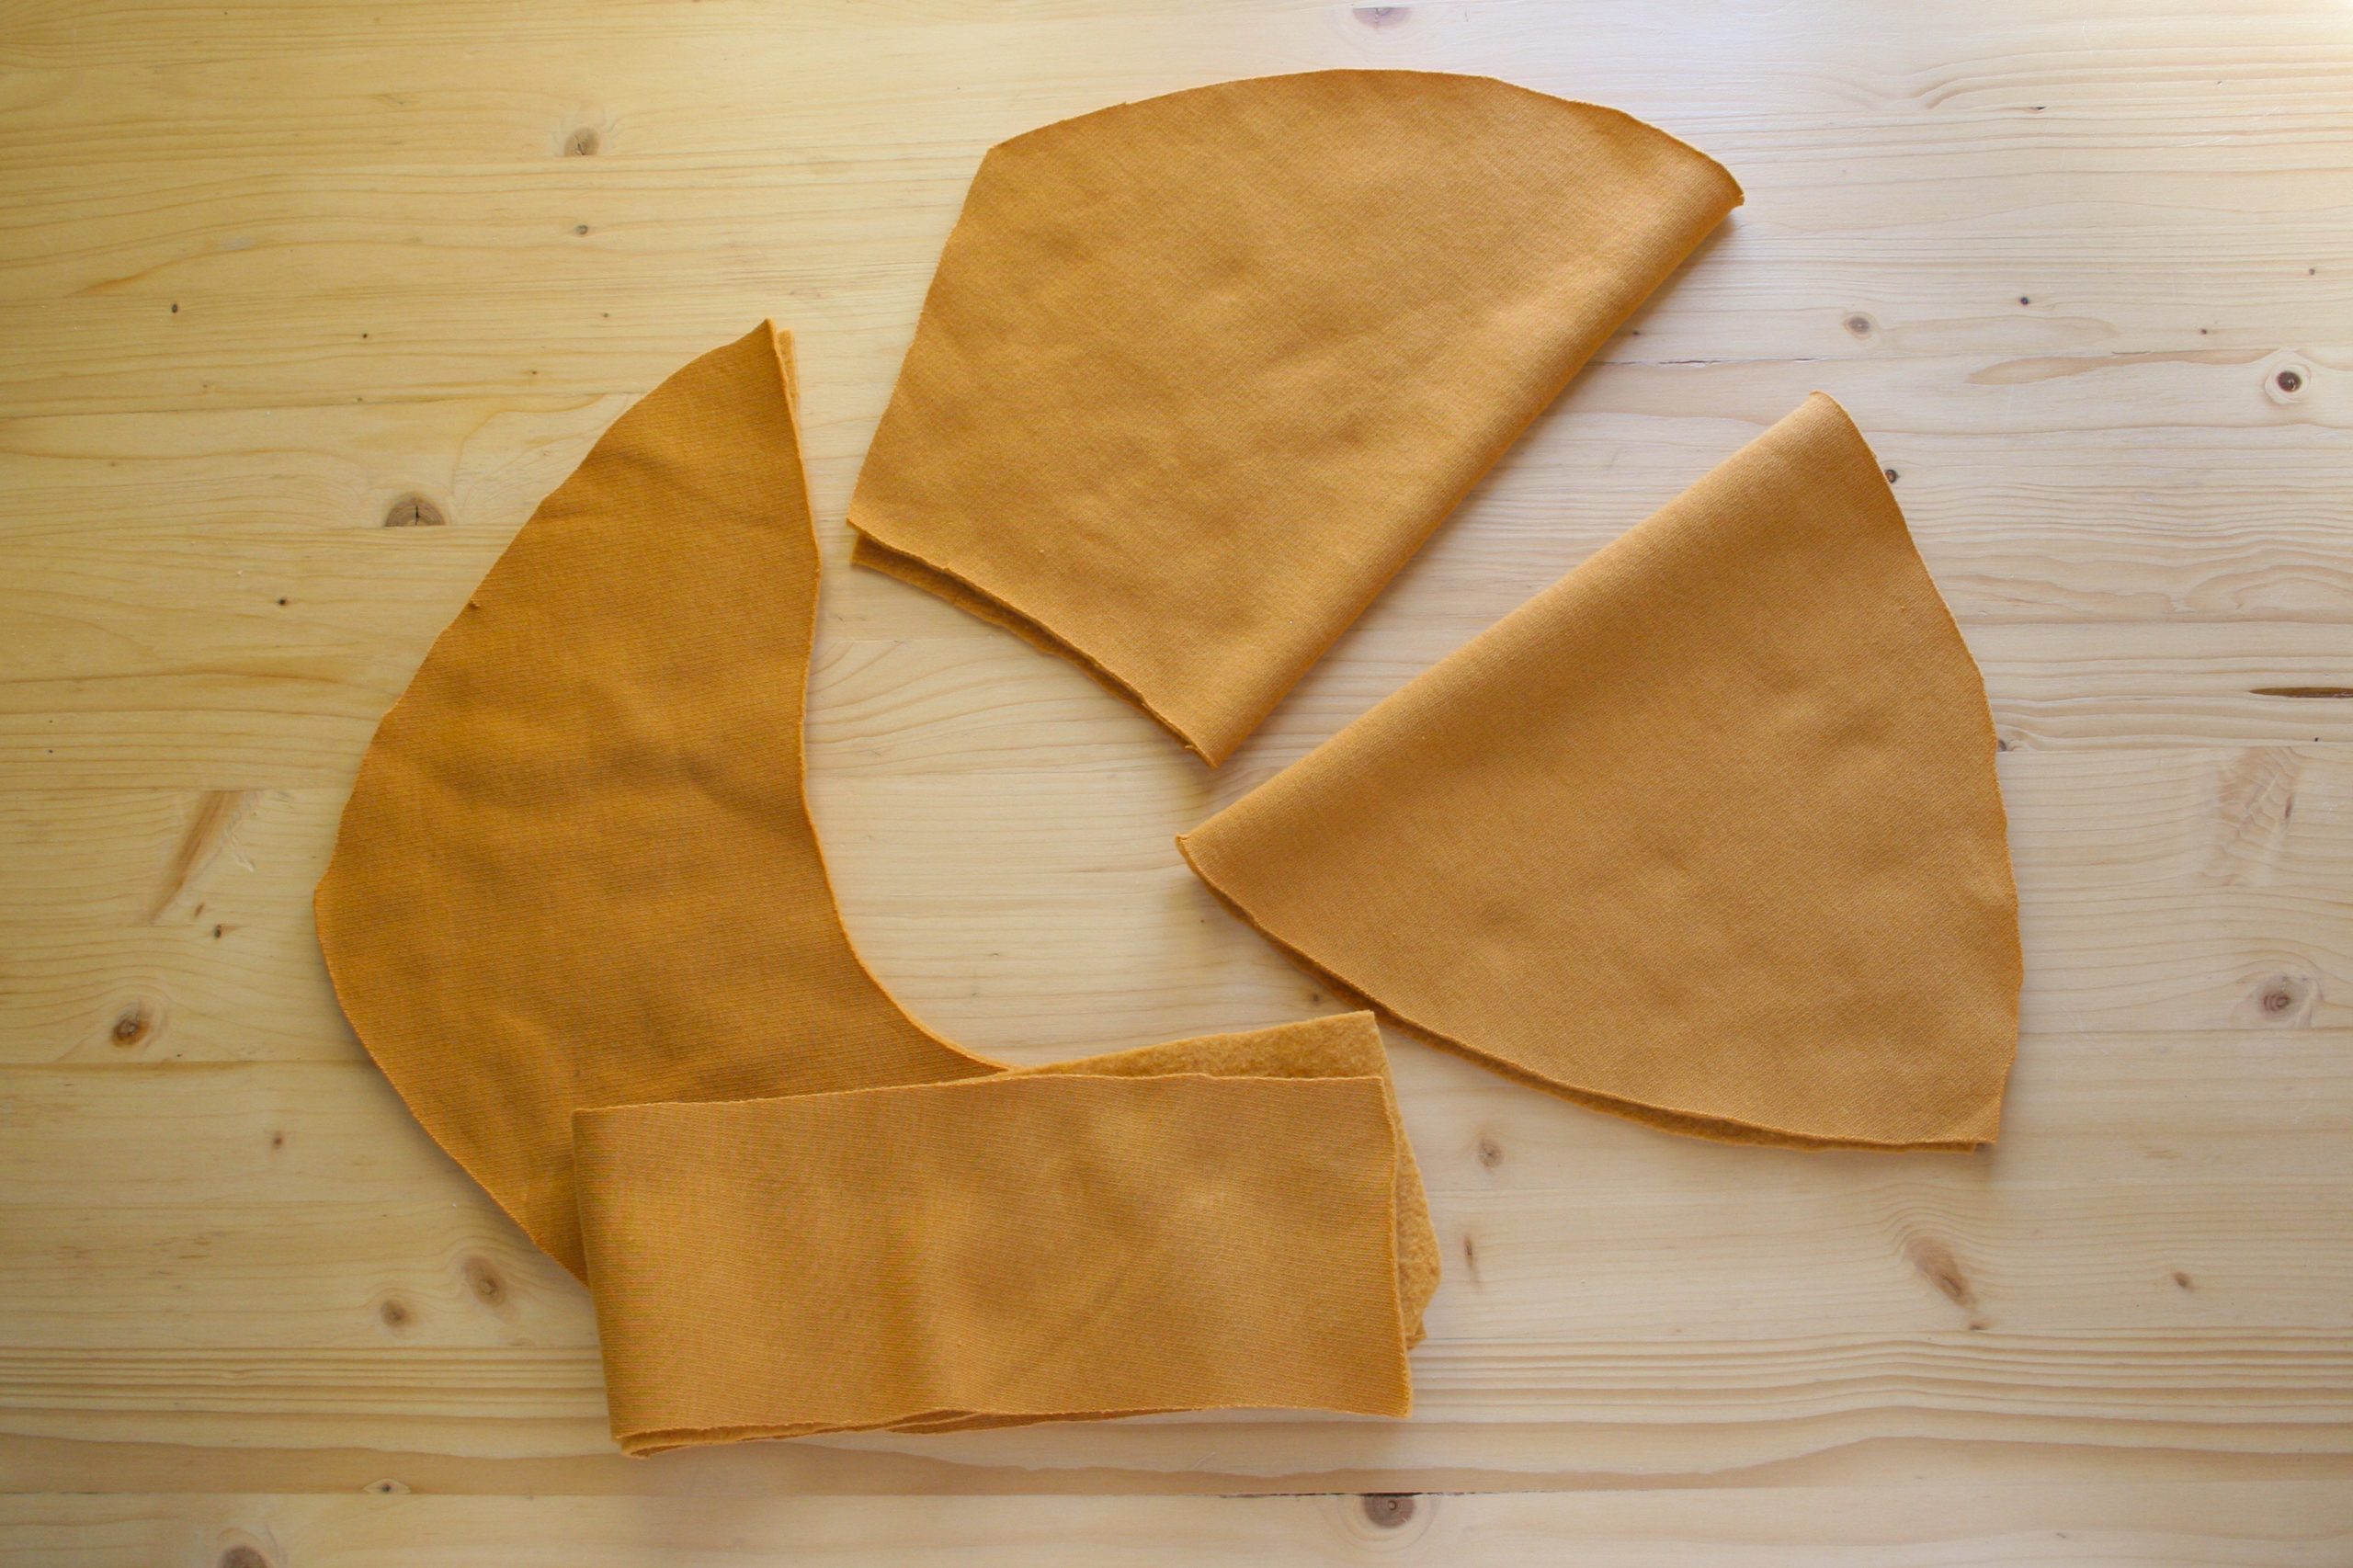
- the three Hood pieces (nr. 6, 7 and 8)
- pins
- basting thread (optional)
- bias tape (optional)
- iron & press cloth
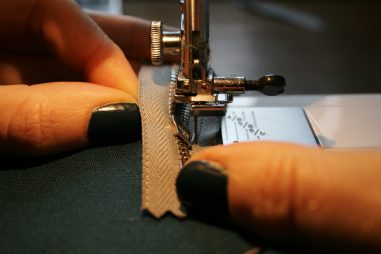
- sewing machine

Step 1: Bottom & top


Sew the bottom piece (7) to the top piece (8) right sides together, along the curved edge, matching the notch. Press the seam open. This seam will be visible when the hood is down, so it would be best to finish it. A few options for finishing the hood seams:
- Serge and topstitch
- Cut one seam allowance to 1/4″ (0,5 cm), fold the other one over it, and stitch together or topstitch.
- Cut both seam allowances to 1/4″ (0,5 cm) and sew bias tape flat over both seams.
- Fold bias tape over both seam allowances and stitch.
Step 2: Bottom to neckline

Sew the hood bottom to the back neckline. The notches match with the shoulder seams. Leave 5/8″ (1,5 cm) open at each end. Don’t finish this seam yet.
Step 3: Hood V and rim


Sew the hood pieces (6) right sides together, along the inside. Stop at the mark. Trim the seam allowance along the curved edge to 1/4″ (0,5 cm). This will create a smooth curve when you turn the pieces right side out. I wouldn’t recommend clipping notches in the seam allowances: this can weaken the seam and the clippings can become visible through the fabric over time. Press the seam open. Then turn right sides out, and press the seam again.
You can baste the hood pieces together along the V if you like. It makes setting it into the neckline a bit easier. You can also just use a few pins to keep the edges aligned.
Step 4: Connect


Sandwich the end of the rim between the V where you left it open. Align the seam allowances and pin them together. Sew from the end of the seam towards the edge, securing the rim between the V pieces.
Grade the seam allowances to reduce bulk. Leave the seam allowance of the V as is, and trim the end of the rim in half. Cut off the triangle that is sticking out at the edge.
Step 5: Insert


Pin the V and rim to the neckline and the hood pieces, matching the notches. Two of the notches should match with the seams of the hood bottom and neckline on either side. Match all the notches first, then ease in the fabric in between the notches.
Start sewing at the seam of the neckline and the hood bottom. Sew the V until the neckline seam at the other side. Backstitch, and then start again on the other side of the neckline to do the rim. I find it easiest to sew with the wrong side of the bodice up. That way you can see easily where the neck seam begins and ends.
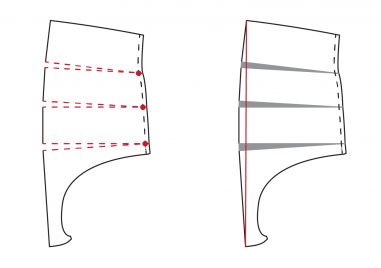
Step 6: Grade & finish


Grade the seam allowance of the V as follows: Leave the bodice seam allowance as is, trim the middle one to 3/5″(1 cm) and the last one to 1/4″ (0,5 cm). Press the seams open and then towards the hood. This reduces bulk along the V of the hood some volume but also gives it some volume.
Finish the seams of the rim and back neckline using one of the options in Step 2.


That’s it for the hood! If you have any questions leave a comment or shoot me an email.


I haven’t sewn this one yet but I will. Was I dreaming or did I see a smaller version of the hood? Thanks. Bonnie Parrigon [email protected]
Hi Bonnie, I’ve written a tutorial on how to make the hood smaller. However, the pattern that is available now already has a hood that is a little smaller than the first version.
I am currently sewing a Jasper for my daughter. Have to confess this step-by-step saved me much time and efforts!! Thank you Lisa.
Great! That’s what these posts are for.
What is the best type of fabric to use for a jasper sweater?
Hi Janet, the best type is a sweatshirt fleece, with a jersey right side and a soft brushed back side. Those usually have 10-20% stretch which is perfect. You can also use a French Terry or a regular fleece. Just pay attention to the stretch so your sweater doesn’t come out too small or too large.
I did not see my size on the chart. I do like the hooded sweater dress .
Did you see we use our own sizes? It’s best to check the bust size in inches or cm.
Hi~ Was led to your pattern by an older picture of the hoodie before the official pattern I suppose. I love big hoods but it looks like the one pictured for the patterned version is smaller than the first version? Are there tips included in the pattern about making the hood bigger?
Hi Cate, you’ve seen that right, it is a bit smaller. I found that the big hood was harder to keep in shape, it got floppy very easily. I suggest sizing up, while keeping the bottom of the collar the same size so it still fits the neckline. And using a fabric without much drape, or lining it for extra stability.
Lisa, do you have any recommended tutorials for lining the hood?
Hi, do you have a tutorial for lining the hood?
Thanks :)