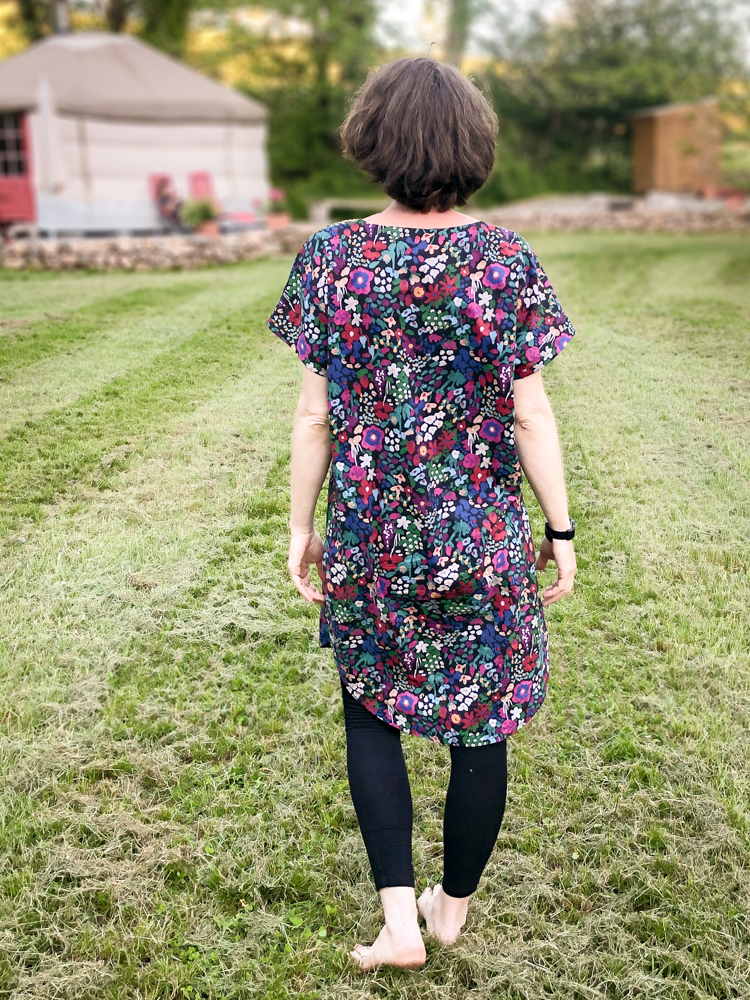
Ultraviolet Hack: Lengthen to a Dress
As promised, here’s a tutorial on how to lengthen the Ultraviolet Tee into a Dress. Depending on your measurements, this could be a super simple hack or a simple hack, either way it’s quickly done!
What you need
- Ultraviolet Tee pattern
- Measuring tape
- Extra pattern paper
- Pencil
- Long ruler
- Scissors & tape
Step 1: Take Measurements
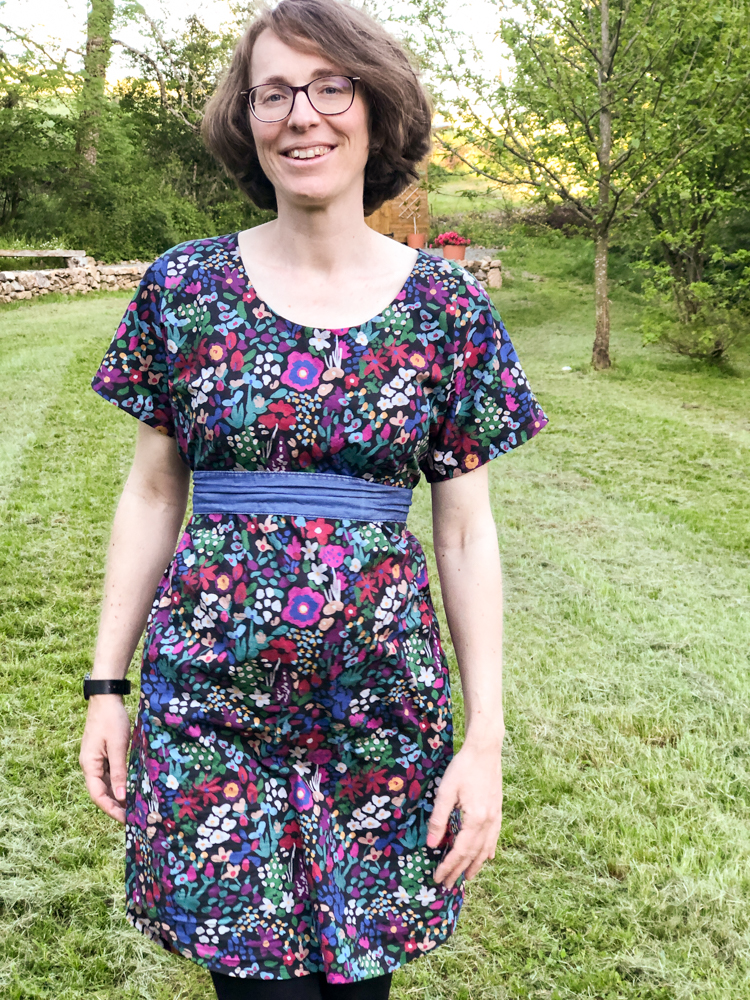
Decide how long you want your dress to be. I chose knee length at the front, the back is a bit longer due to the shape of the View A hem. Take the measurement from the middle of your shoulder to the length you want the hem to end.
Look at the size chart for your hip measurement. Is your hip in a lower column than your high bust, then you don’t have to take the hip measurement into account. If it’s the same or higher (like it is for me), note it down. Also measure from the middle of your shoulder, straight down, to the same height as the widest point on your hips.
We’re adding some width to the hip, because even though the pattern is oversized, you want to make sure you have enough room to move comfortably. You need to walk and sit down without the dress restricting you! This is especially true for wovens, for knits you only need more if your hip is in a higher column than your high bust.
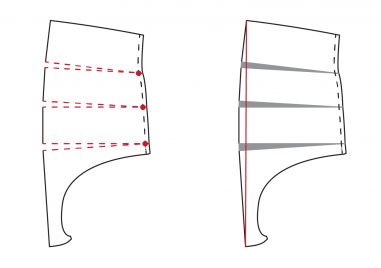
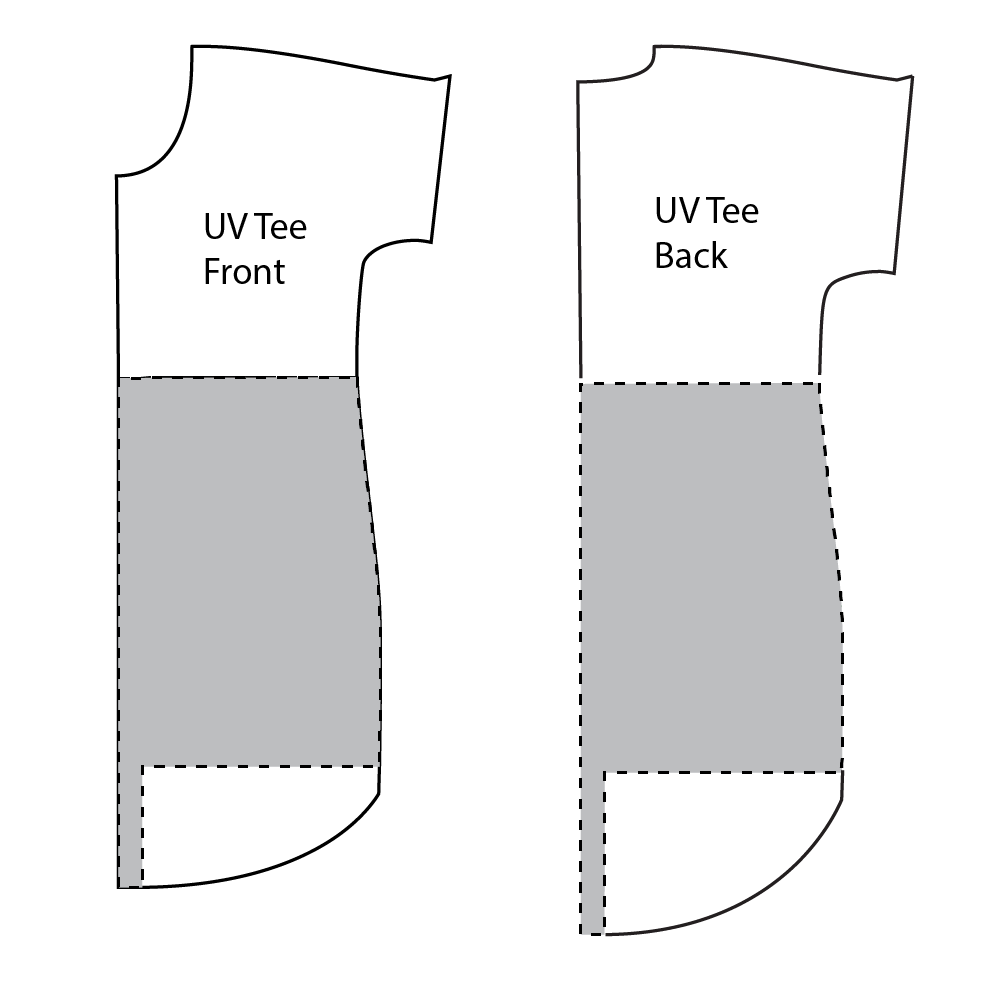
Step 2: Cut into the pattern
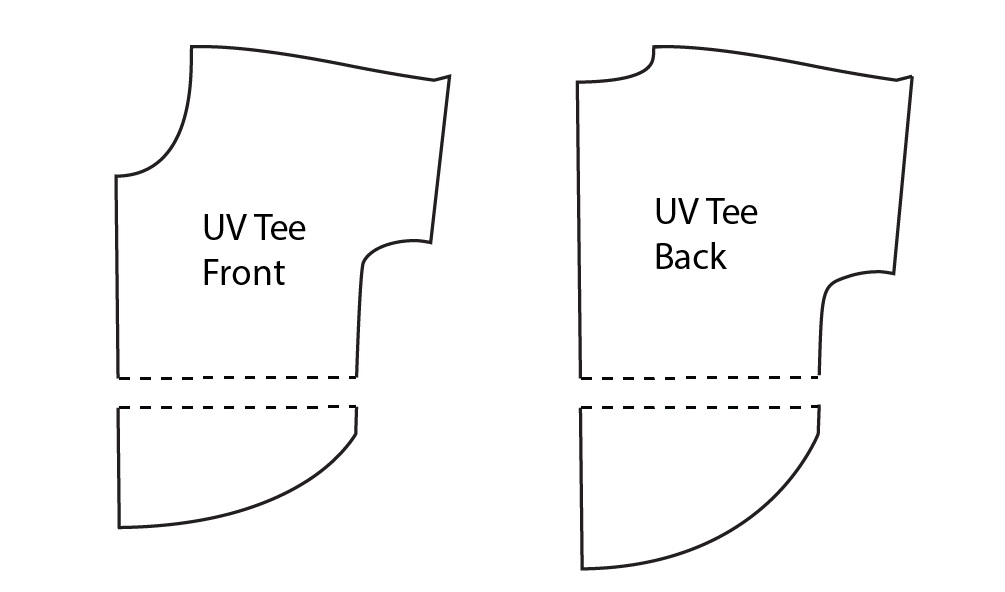
Pick the hem shape that you want (View A, B or C) and cut out your front and back. Pay attention to the cutting lines for the knit or woven version. Pictured above is View A. Cut the back and the front piece along the lengthen/shorten line.
Step 3: Lengthen
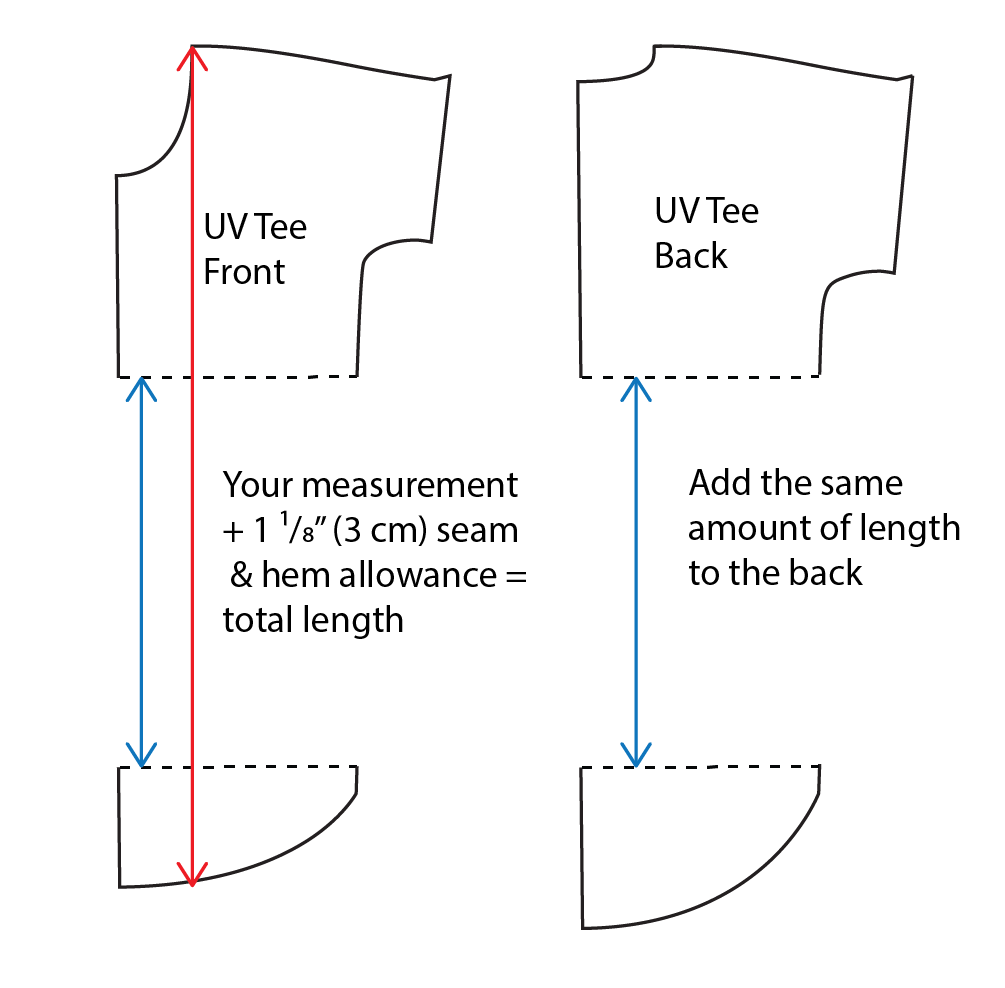
Take your shoulder-hem measurement, and add 1 1/8″ (3 cm). This is because the pattern piece includes seam and hem allowance, and it would turn out too short if you didn’t add this to your measurement. Tape the top piece to extra pattern paper, and draw a line along the Center Front (CF) continuing down. This will help you line up the bottom part along the CF. Shift the bottom part down so it matches your measurement, and tape it down.
For the back, measure the distance between the top and bottom of the Front, and add the same amount of length to the back piece. You can’t use the hem measurement for View A because the back hem is lower than the front.
If you don’t need to make any adjustments to the hip measurement, then just draw a new line at the side seam connection the top and bottom.
Step 4: Widen hip
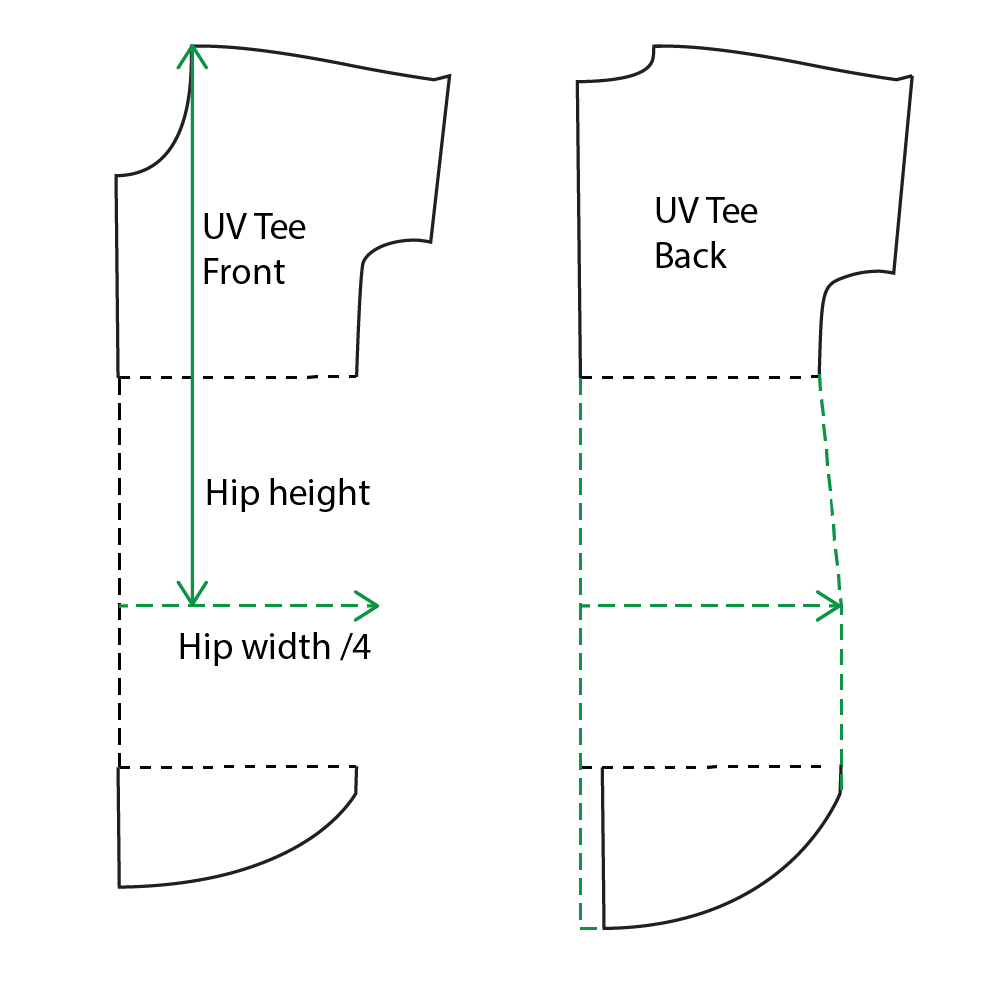
Take the shoulder-hip measurement you took earlier and mark it on the pattern pieces. Draw a horizontal line through that point, up to the width of the top and bottom. Add 1/2″ (1.25 cm) for every column that your hip is bigger than your high bust. So if it is the same, add 1/2″, if it is one higher, add 1″, etc.
Step 5: Side seam and hem
Draw a line from the top sides seam to your hip point. Draw a straight line down from there. Shift the bottom pattern piece out to meet that line. Fill in the gap at the CF. That’s it!
For my dress, Size 8-10, I needed 1,5m of fabric. I had a narrow width, but could still make it work so this should be enough for larger sizes as well.
I’d love to see your Ultraviolet Dress if you make one, don’t hesitate to put your link in the comments!