Jasper Crossover Collar – Tutorial by Stannel
I am so thrilled to have this post for you today! A while back a gorgeous Jasper hack popped up in my feed. Lindsey from Stannel had used another tutorial on the Jasper to make a collar with a crossover front. She mentioned wanting to do a tutorial in Dutch, so I asked if I could post it here too, and she said yes. This one will be in English, you can read the Dutch version on Lindsy’s blog. Take it away Lindsy!


My name is Lindsy van Espen, 37, and I live in Aarschot, Belgium. I’m a physical education teacher on the high school where I used to go to. I’m married and mother to Stan (2011) and Nel (2012). They are the inspiration for my blogname: Stannel. I first experienced sewing in 1996. I was staying in Texas, US, as an exchange student for a year and I could choose my own subjects, so I chose sewing. I didn’t sew again until I was pregnant with Stan. A hernia and arthritis in my back made sports impossible for me, so I had to trade in active me-time for creative me-time. I started to take sewing lessons again. Since then I make something almost daily and I regularly blog what I make.
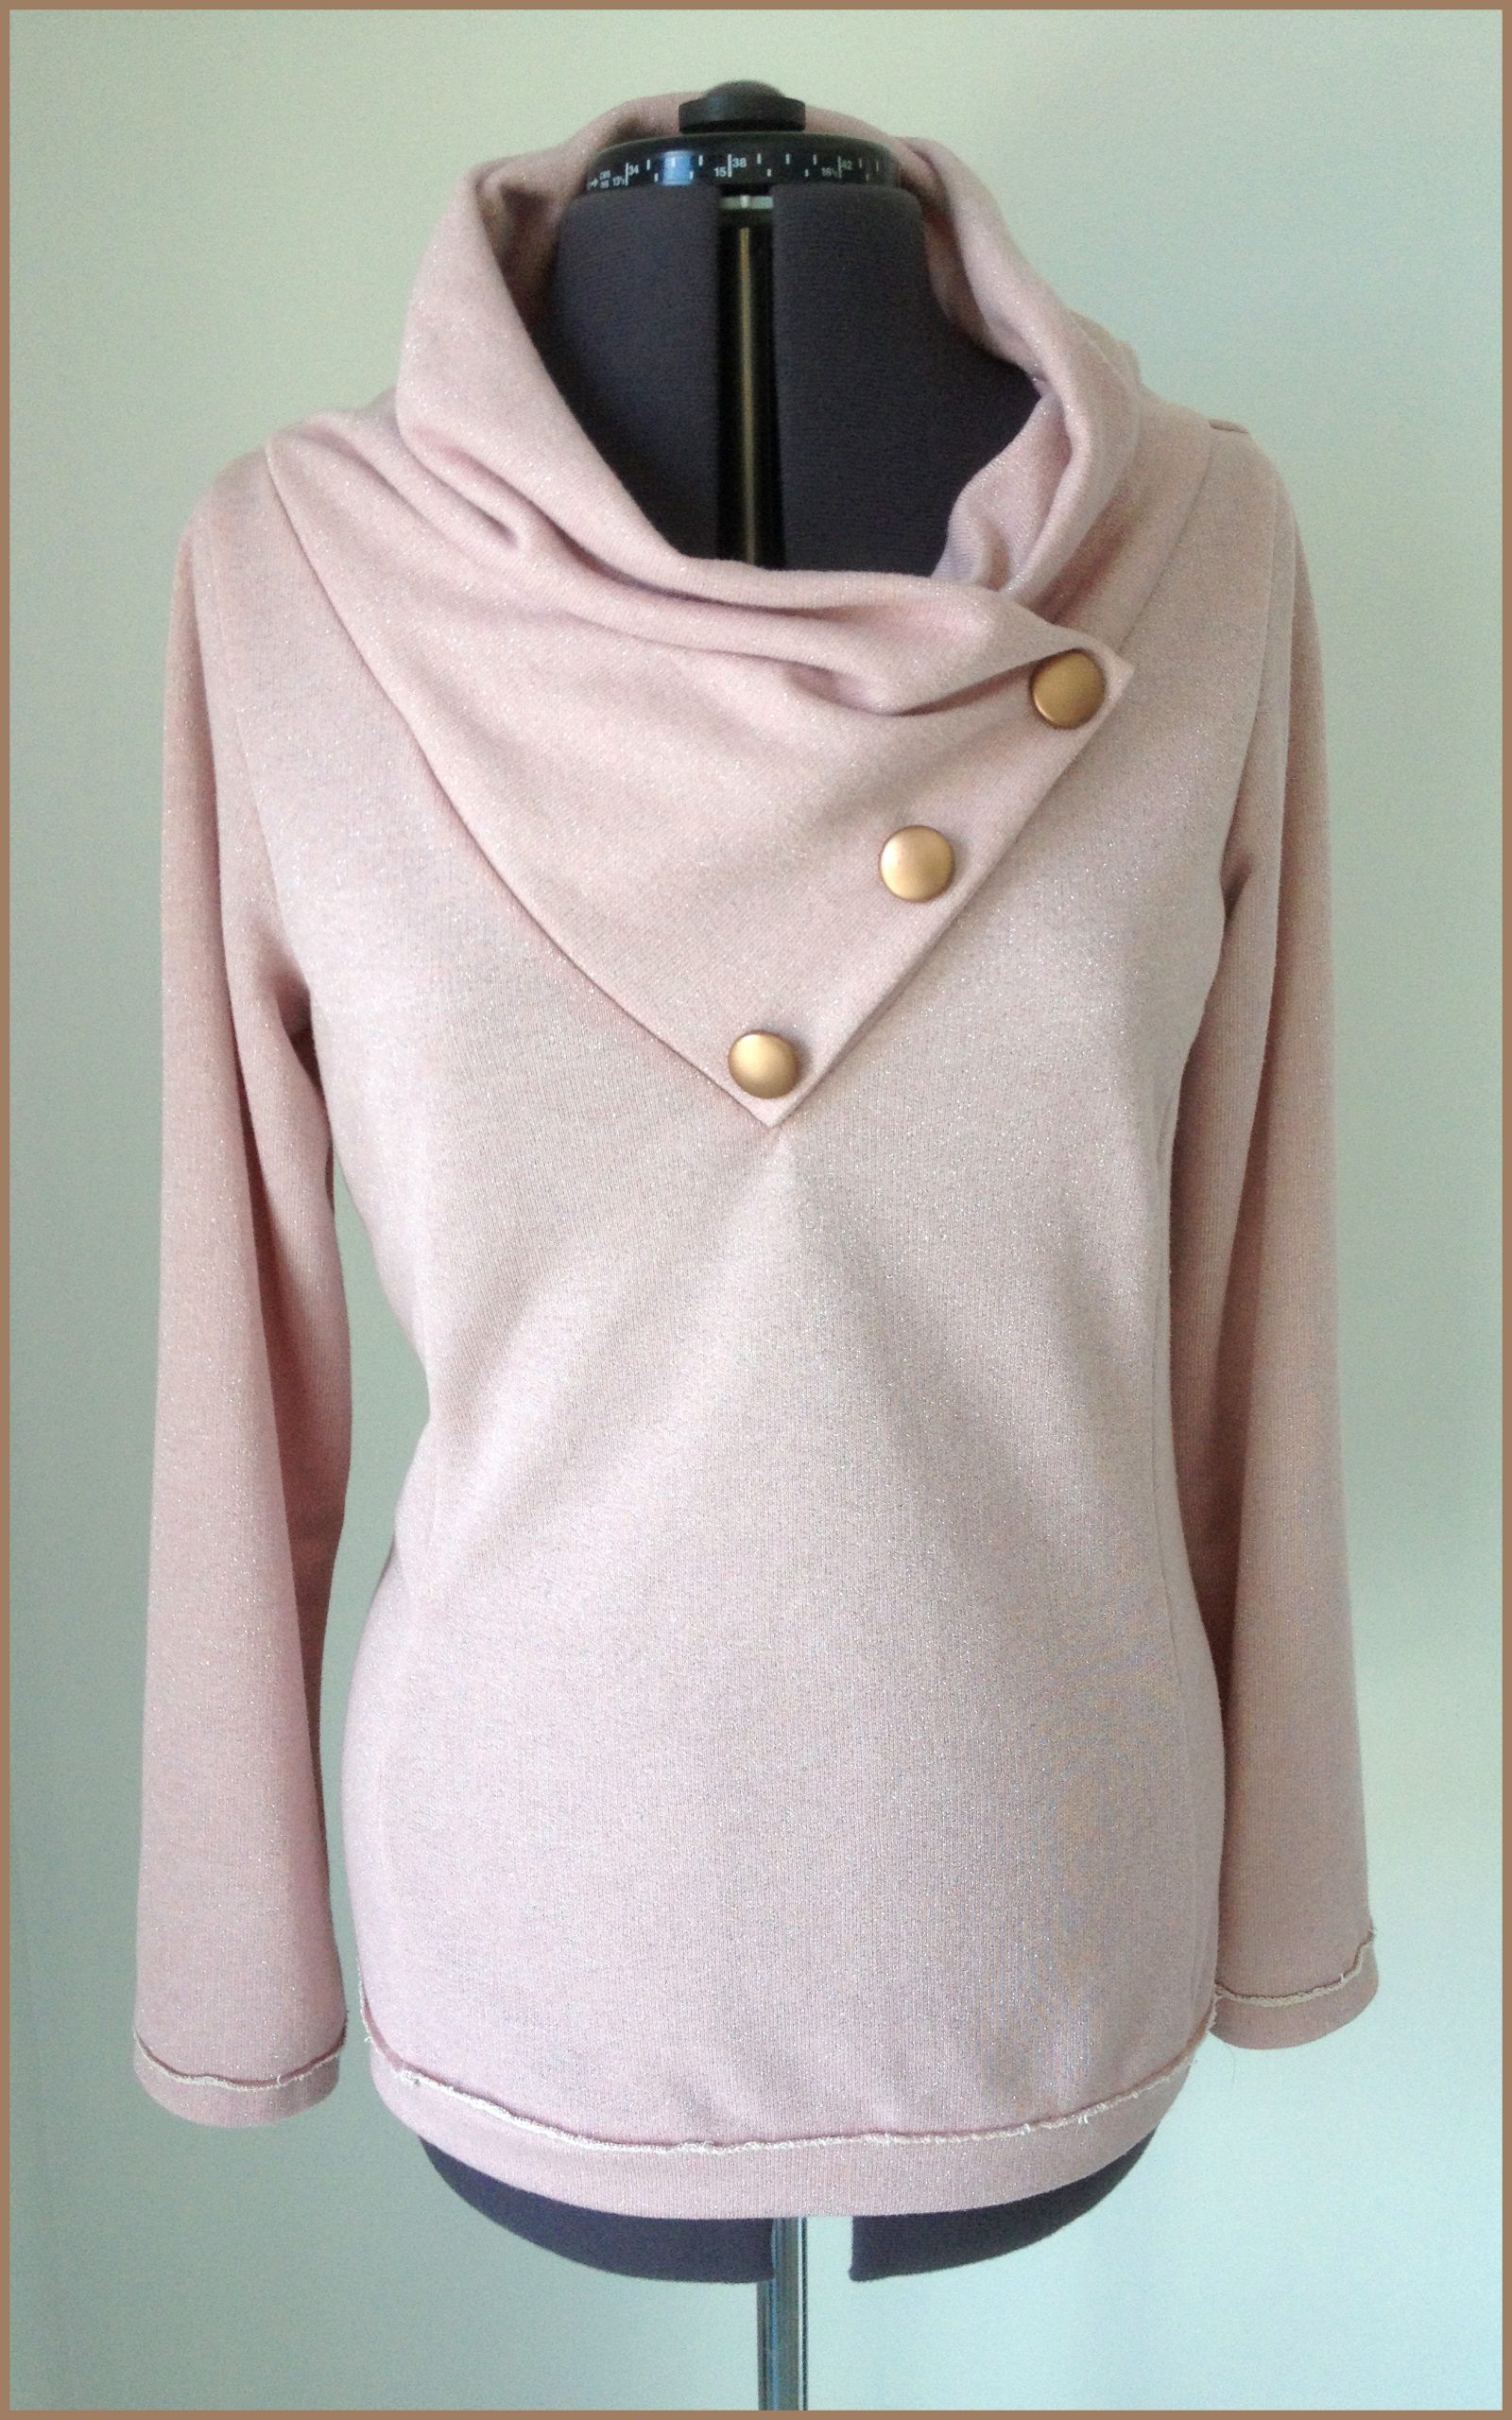
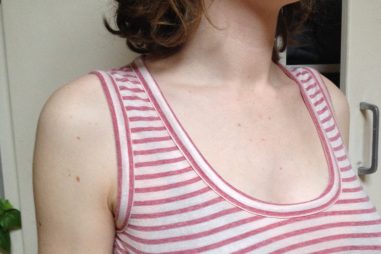
The original tutorial is in English, and is made with a dress. You can hack almost any sweater or dress pattern to get this collar, but it looks great on the Jasper. The weight of the fabric has influence on the way the collar drapes: the heavier, the fuller the collar.
What you need
- The Jasper Sweater/Dress pattern
- A ruler
- Pencil
- The new collar: a rectangle of fabric measuring 35″ by 15 3/8″ (89 by 39 cm). This measurement depends on how big you make your V on the Front bodice. See the calculation at Step 3.
- A small piece of interfacing for the point of the collar
- A piece of interfacing, 3/4″ (2 cm) wide and 15 3/8″ (39 cm) long
- Button(s)
Step 1: Adjusting the pattern

Make two marks on the shoulder of the front piece of the Jasper pattern, starting at the sleeve side: one at 1 1/8″ (3 cm) and one at 5/8″ (1,5 cm) from the first mark.

Decide how deep you want your V to be. I wanted it at the same height as my apex, 27 cm. Measure yourself, then transfer your measurement to the pattern. Measure from the inside of the shoulder (at the stitching line, not the seam allowance) to where your apex is. Mark this as a line on your pattern.

Connect the 1 1/8″ (3 cm) mark with the line at the center front. Add the 5/8″ (1,5 cm) seam allowance. Cut off the excess.

If you also lower the neckline at the back, the collar will fall better. Trace the shoulder markings of the front onto the markings of the back. I lowered the neckline 4,5 cm. Draft a new neckline parallel to the original one. Add 1,5 cm seam allowance and cut off the excess. Now you can cut out your Jasper in fabric.
Step 2: Preparing the Front and Back

You’ll attach the collar before sewing the rest of the garment. Mark the pivot point at the bottom of the V. Staystitch the neckline at 3/8″ (1 cm) to prevent the neckline from stretching out. Sew the shoulders of the front and back together, right sides together.

Reinforce the point of the V with fusible interfacing. Make sure the interfacing stretches on the crossgrain. Staystitch over the V, just on the inside of the original stitching line. Snip the V, just until the stay stitching.
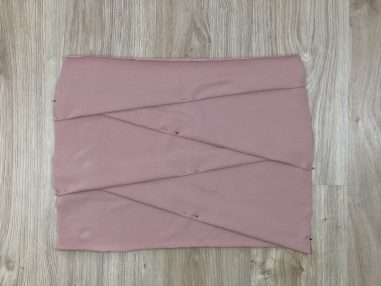
Step 3: Prepare the collar
Measure the circumference of the neckline, at the stitching line. If you have drafted your front piece with different measurements than listed in this example, here’s how you can calculate the length of the collar:
(circumference neckline x 0,9) + 1 1/8″ or 3 cm.
The collar will be slightly shorter than the neckline. If you stretch it a bit while sewing it will result in a smoother seam. If your fabric has a lot of stretch, you could also substitute 0,9 by 0,85 in the formula. The added 1 1/8″ (3 cm) is the seam allowance.
For the height or the collar:
(desired height x 2) + 1 1/8″ or 3 cm.
In this example the desired height was 7″ (18 cm), so the total height of the collar is 15 3/8″ (39 cm).

If you want to add buttons, iron the strip of interfacing onto the right short side of the collar, on the wrong side. Place it at 5/8″ (1,5 cm) from the raw edge.
Fold the interfaced side lengthwise, right sides together. Sew at 5/8″ (1,5 cm). Press open en trim the seam allowance. Fold with right sides out. and press lengthwise. The left side of the collar will be left open.
Step 4: Attaching the Collar


Pin the finished side of the collar to the V in the neckline. Pin it so that it is flush with the snip in the V that you made, the finished edge lying at the point of the V.

Pin the rest of the collar to the neckline, stretching slightly. You should have 5/8″ (1,5 cm) left over at the end, sticking out past the V.

Start sewing at the right shoulder, via the back neckline toward the V with the unfinished collar end. Sew with the front facing up. At the pivot point, put your needle down. Align the ends of the collar in such a way that the part with the finished end of the collar is sandwiched between the 5/8″ (1,5cm) seam allowance of the collar and the front piece. Use pins to keep it in place. This last part of the seam is quite thick, so you can use a hump jumper or something else to lift up the back of your presser foot.
Sew until you reach the right shoulder, backstitch. Finish the seams around the neckline with a zigzag or a serger.


Attach one or more buttons to fasten the finished end of the collar. Actual buttonholes aren’t necessary, the neck opening is big enough. Finish the rest of the sweater as in the instructions.
The fabrics used in this tutorial are from Huis Van Katoen:
- Gebreide Jacquard Bordeaux for the collar, cuffs and hem
- Tricot – effen bordeaux for the bodice
These fabrics are also available in blue: here and here.
Thanks so much for sharing your Jasper hack Lindsy! It looks super cosy and a great alternative for the collar that comes with the pattern. If you, reader, have any questions, please leave a comment. See you in the new year!

This is fabulous! now to find the time to cut out and sew up my first Jasper to see how they fit.
Hoi, kan ik ergens een nederlandstallige handleiding vinden voor de Jasper dress? Alvast bedankt
Grtjs Evelein
Hoi Evelien, nee helaas die is er niet. Als je vragen hebt kun je me wel mailen.
Thank you so much for such a very detailed instruction on adapting this collar! It is just what I’ve been looking for……Brilliant x
Glad to hear it Eileen!
Thank you, a very stylish change . Will save this tutorial and get sewing !